
Vegan Food & Recipes Feed
f know how it goes. Still craving pumpkin? Make a Pumpkin Spice Latte https://chocolatecoveredkatie.com/wp-content/uploads/2024/06/Pastry-Dough-Pie-Crust.jpg Healthy pumpkin pie crust You may use your own favorite pie crust recipe or a store bought crust.…
Recipe-245x245.jpg <svg<g<pathPrint Healthy Pumpkin Pie
<svg<defs<lineargradient<stop<stop<stop<stop<defs<lineargradient<stop<stop<stop<stop<defs<lineargradient<stop<stop<stop<stop
<svg<path<svg<path<svg<path<svg<path<svg<path This holiday favorite healthy pumpkin pie recipe is rich, creamy, and naturally sweetened!
Course Dessert
Cuisine American
Keyword healthy, pie, pumpkin
Cook Time 27 minutes minutes
Total Time 27 minutes minutes
Servings 8 slices
Calories 130kcal
Author Katie Higgins Ingredients
* 15 oz pumpkin puree (425g)
* 13.5 oz canned coconut milk (380g)
* 1/4 cup rolled oats (20g) or 3 tbsp flour of choice
* 2 tbsp ground flax (14g) or 1 egg (for flax free, try this Vegan Pumpkin Pie)
* 1/2 cup coconut sugar or xylitol for sugar free (100g)
* 2 tsp cinnamon (5g)
* 1 tsp pumpkin pie spice (2g)
* 1/2 tsp salt
* 1 tbsp pure vanilla extract (15g)
* 1 pie crust (or use the crust recipe included above) Instructions
*
1. Prepare a pie crust ahead of time, then set it aside.
*
2. To make the healthy pumpkin pie, start by preheating the oven to 400° Fahrenheit (205° Celsius).
*
3. If using oats, blend them first into a fine flour consistency, using a blender or food processor. Then stir or blend all pie ingredients together until smooth.
*
4. Pour the pumpkin filling into the crust and bake the pie for 27 minutes on the center rack of the oven. Its texture should still look underdone after this time.
*
5. Let it cool, then refrigerate at least 6 hours uncovered for the pie to thicken and set.
* View Nutrition Facts Video Notes
Also be sure to make this healthy Pumpkin Banana Bread. Nutrition
Serving: 1slice | Calories: 130kcal | Carbohydrates: 4.4g | Protein: 2.5g | Fat: 12g | Saturated Fat: 7g | Polyunsaturated Fat: 3g | Monounsaturated Fat: 2g | Sodium: 140mg | Potassium: 174mg | Fiber: 2.4g | Sugar: 1.4g | Vitamin A: 3000IU | Vitamin C: 12mg | Calcium: 23mg | Iron: 1mg https://chocolatecoveredkatie.com/wp-content/uploads/2016/10/hello-breakfast-recipes-1.png More About The Cookbook More healthy holiday desserts https://chocolatecoveredkatie.com/wp-content/uploads/2024/06/Vegan-Healthy-Chocolate-Cake.jpg Healthy Chocolate Cake https://chocolatecoveredkatie.com/wp-content/uploads/2018/11/Pumpkin-Cupcakes-Cream-Cheese-Frosting.jpg Pumpkin Cupcakes https://chocolatecoveredkatie.com/wp-content/uploads/2018/11/Vegan-Cheesecake-Recipe.jpg Vegan Cheesecake Recipe https://chocolatecoveredkatie.com/wp-content/uploads/2018/11/apple-pie-healthy.jpg Healthy Apple Pie https://chocolatecoveredkatie.com/wp-content/uploads/2022/08/Vegan-Chocolate-Chip-Cookies.jpg Vegan Chocolate Chip Cookies
The post Healthy Pumpkin Pie appeared first on Chocolate Covered Katie.
➖ @VeganFoodFeed ➖
<svg<defs<lineargradient<stop<stop<stop<stop<defs<lineargradient<stop<stop<stop<stop<defs<lineargradient<stop<stop<stop<stop
<svg<path<svg<path<svg<path<svg<path<svg<path This holiday favorite healthy pumpkin pie recipe is rich, creamy, and naturally sweetened!
Course Dessert
Cuisine American
Keyword healthy, pie, pumpkin
Cook Time 27 minutes minutes
Total Time 27 minutes minutes
Servings 8 slices
Calories 130kcal
Author Katie Higgins Ingredients
* 15 oz pumpkin puree (425g)
* 13.5 oz canned coconut milk (380g)
* 1/4 cup rolled oats (20g) or 3 tbsp flour of choice
* 2 tbsp ground flax (14g) or 1 egg (for flax free, try this Vegan Pumpkin Pie)
* 1/2 cup coconut sugar or xylitol for sugar free (100g)
* 2 tsp cinnamon (5g)
* 1 tsp pumpkin pie spice (2g)
* 1/2 tsp salt
* 1 tbsp pure vanilla extract (15g)
* 1 pie crust (or use the crust recipe included above) Instructions
*
1. Prepare a pie crust ahead of time, then set it aside.
*
2. To make the healthy pumpkin pie, start by preheating the oven to 400° Fahrenheit (205° Celsius).
*
3. If using oats, blend them first into a fine flour consistency, using a blender or food processor. Then stir or blend all pie ingredients together until smooth.
*
4. Pour the pumpkin filling into the crust and bake the pie for 27 minutes on the center rack of the oven. Its texture should still look underdone after this time.
*
5. Let it cool, then refrigerate at least 6 hours uncovered for the pie to thicken and set.
* View Nutrition Facts Video Notes
Also be sure to make this healthy Pumpkin Banana Bread. Nutrition
Serving: 1slice | Calories: 130kcal | Carbohydrates: 4.4g | Protein: 2.5g | Fat: 12g | Saturated Fat: 7g | Polyunsaturated Fat: 3g | Monounsaturated Fat: 2g | Sodium: 140mg | Potassium: 174mg | Fiber: 2.4g | Sugar: 1.4g | Vitamin A: 3000IU | Vitamin C: 12mg | Calcium: 23mg | Iron: 1mg https://chocolatecoveredkatie.com/wp-content/uploads/2016/10/hello-breakfast-recipes-1.png More About The Cookbook More healthy holiday desserts https://chocolatecoveredkatie.com/wp-content/uploads/2024/06/Vegan-Healthy-Chocolate-Cake.jpg Healthy Chocolate Cake https://chocolatecoveredkatie.com/wp-content/uploads/2018/11/Pumpkin-Cupcakes-Cream-Cheese-Frosting.jpg Pumpkin Cupcakes https://chocolatecoveredkatie.com/wp-content/uploads/2018/11/Vegan-Cheesecake-Recipe.jpg Vegan Cheesecake Recipe https://chocolatecoveredkatie.com/wp-content/uploads/2018/11/apple-pie-healthy.jpg Healthy Apple Pie https://chocolatecoveredkatie.com/wp-content/uploads/2022/08/Vegan-Chocolate-Chip-Cookies.jpg Vegan Chocolate Chip Cookies
The post Healthy Pumpkin Pie appeared first on Chocolate Covered Katie.
➖ @VeganFoodFeed ➖
Dr. Doug Lisle Answers Questions on Sex, Porn, Super Normal Stimuli, Phone Addiction, Grief and Loss
Dr. Doug Lisle Answers Questions on Sex, Porn, Super Normal Stimuli, Phone Addiction, Grief and Loss - YouTubeDr. Doug Lisle Answers Questions on Sex, Porn, Super Normal Stimuli, Phone Addiction, Grief and Loss - YouTube
Dr. Doug Lisle Answers Questions on Sex, Porn, Super Normal Stimuli, Phone Addiction, Grief and Loss - YouTubeDr. Doug Lisle Answers Questions on Sex, Porn, Super Normal Stimuli, Phone Addiction, Grief and Loss - YouTube
Am I Now Stage 4? What Will I Do About It + The REAL Cause of My Lung Cancer Revealed with Dr. Matt
Am I Now Stage 4? What Will I Do About It + The REAL Cause of My Lung Cancer Revealed with Dr. Matt - YouTubeAm I Now Stage 4? What Will I Do About It + The REAL Cause of My Lung Cancer Revealed with Dr. Matt - YouTube
Am I Now Stage 4? What Will I Do About It + The REAL Cause of My Lung Cancer Revealed with Dr. Matt - YouTubeAm I Now Stage 4? What Will I Do About It + The REAL Cause of My Lung Cancer Revealed with Dr. Matt - YouTube
Chocolate Covered Katie
Maple Bread
This delicious maple bread recipe is irresistibly soft, fluffy, and packed with the flavors of warm maple syrup, vanilla and cinnamon sugar!
https://chocolatecoveredkatie.com/wp-content/uploads/2026/10/Maple-Bread-With-Maple-Syrup-Glaze.jpg https://chocolatecoveredkatie.com/wp-content/uploads/2015/09/pin-it-e1441245481357.png The best homemade maple bread
* With rich maple swirled into each bite, it’s the perfect recipe for cold weather days.
* You will fall in love with the thick texture and tender crumb.
* A simple maple glaze icing takes the loaf to a whole new level of deliciousness.
* You’ll feel as if you were transplanted to a cozy little café in Vermont. Yet the recipe is surprisingly easy to make at home, with no yeast and no kneading or waiting hours for the bread dough to rise.
* Enjoy a slice or two for breakfast, hot from the oven with a cup of coffee. Or serve it warmed up, as a tasty afternoon snack or dessert.
* Low fat, oil free, dairy free, gluten free, and vegan options are all included. Plus, just 130 calories per serving. You may also like this Apple Bread Full recipe video
https://chocolatecoveredkatie.com/wp-content/uploads/2026/10/Homemade-Maple-Bread-Ingredients.jpg Maple loaf ingredients Maple Syrup – You need a fourth cup in the bread and a tablespoon for the frosting. Be sure to buy pure maple syrup, which is not the same thing as maple flavored pancake syrup. Pure Vanilla Extract – Warm vanilla compliments the maple and cinnamon in the recipe. Flour – White all purpose flour or whole grain spelt flour both work. Whole wheat flour yields a heartier, denser bread. For a maple oatmeal loaf with a fun chewy composition, use oat flour.
If you want gluten free maple bread, go with all purpose gluten free flour. Or for a low carb baked good, follow my recipe for Almond Flour Muffins or Almond Flour Banana Bread and add half a teaspoon of maple extract. Sugar – Use white sugar, unrefined coconut sugar, or a granular sugar free sweetener like monk fruit. For the best texture, it’s important to use both a dry and liquid sweetener. This gives the loaf a light and tender crumb, as opposed to a gummy finish. Oil – I love coconut oil here. Vegetable oil or unsalted butter also work. You can substitute applesauce for an oil free quick loaf, but it will taste more like a muffin and lack that moist, buttery richness of bakery style bread. Salt – The maple recipe calls for a pinch of salt to add depth of flavor. Cinnamon – Ground cinnamon imparts autumn spice and natural sweetness without overpowering the maple. Eggs (optional) – Eggs or prepared vegan flax eggs add lift to the loaf. If you want an eggless bread, swap half a cup milk or nondairy milk. It won’t rise as much but tastes just as delightful. Water – Water adds moisture without extra calories. Other ingredients – Unlike traditional yeast breads, this healthy maple quick bread uses baking powder and baking soda to create a wonderfully light texture. What is maple extract?
This is the secret ingredient to the best maple flavor.
It may seem like a small amount, but do not skip the extract.
Your finished bread will not taste like authentic maple with just maple syrup on its own.
Look for bottled maple extract at your local grocery store, in the baking aisle near the vanilla extract. You can also find this extract at kitchen stores or online.
Maple extract is highly concentrated. A little goes a long way! Still craving maple? Try this Healthy Maple Fudge
https://chocolatecoveredkatie.com/wp-content/uploads/2026/10/Iced-Maple-Loaf-Quick-Bread.jpg The easiest maple glaze
While the b[...]
Maple Bread
This delicious maple bread recipe is irresistibly soft, fluffy, and packed with the flavors of warm maple syrup, vanilla and cinnamon sugar!
https://chocolatecoveredkatie.com/wp-content/uploads/2026/10/Maple-Bread-With-Maple-Syrup-Glaze.jpg https://chocolatecoveredkatie.com/wp-content/uploads/2015/09/pin-it-e1441245481357.png The best homemade maple bread
* With rich maple swirled into each bite, it’s the perfect recipe for cold weather days.
* You will fall in love with the thick texture and tender crumb.
* A simple maple glaze icing takes the loaf to a whole new level of deliciousness.
* You’ll feel as if you were transplanted to a cozy little café in Vermont. Yet the recipe is surprisingly easy to make at home, with no yeast and no kneading or waiting hours for the bread dough to rise.
* Enjoy a slice or two for breakfast, hot from the oven with a cup of coffee. Or serve it warmed up, as a tasty afternoon snack or dessert.
* Low fat, oil free, dairy free, gluten free, and vegan options are all included. Plus, just 130 calories per serving. You may also like this Apple Bread Full recipe video
https://chocolatecoveredkatie.com/wp-content/uploads/2026/10/Homemade-Maple-Bread-Ingredients.jpg Maple loaf ingredients Maple Syrup – You need a fourth cup in the bread and a tablespoon for the frosting. Be sure to buy pure maple syrup, which is not the same thing as maple flavored pancake syrup. Pure Vanilla Extract – Warm vanilla compliments the maple and cinnamon in the recipe. Flour – White all purpose flour or whole grain spelt flour both work. Whole wheat flour yields a heartier, denser bread. For a maple oatmeal loaf with a fun chewy composition, use oat flour.
If you want gluten free maple bread, go with all purpose gluten free flour. Or for a low carb baked good, follow my recipe for Almond Flour Muffins or Almond Flour Banana Bread and add half a teaspoon of maple extract. Sugar – Use white sugar, unrefined coconut sugar, or a granular sugar free sweetener like monk fruit. For the best texture, it’s important to use both a dry and liquid sweetener. This gives the loaf a light and tender crumb, as opposed to a gummy finish. Oil – I love coconut oil here. Vegetable oil or unsalted butter also work. You can substitute applesauce for an oil free quick loaf, but it will taste more like a muffin and lack that moist, buttery richness of bakery style bread. Salt – The maple recipe calls for a pinch of salt to add depth of flavor. Cinnamon – Ground cinnamon imparts autumn spice and natural sweetness without overpowering the maple. Eggs (optional) – Eggs or prepared vegan flax eggs add lift to the loaf. If you want an eggless bread, swap half a cup milk or nondairy milk. It won’t rise as much but tastes just as delightful. Water – Water adds moisture without extra calories. Other ingredients – Unlike traditional yeast breads, this healthy maple quick bread uses baking powder and baking soda to create a wonderfully light texture. What is maple extract?
This is the secret ingredient to the best maple flavor.
It may seem like a small amount, but do not skip the extract.
Your finished bread will not taste like authentic maple with just maple syrup on its own.
Look for bottled maple extract at your local grocery store, in the baking aisle near the vanilla extract. You can also find this extract at kitchen stores or online.
Maple extract is highly concentrated. A little goes a long way! Still craving maple? Try this Healthy Maple Fudge
https://chocolatecoveredkatie.com/wp-content/uploads/2026/10/Iced-Maple-Loaf-Quick-Bread.jpg The easiest maple glaze
While the b[...]
Chocolate Covered Katie
Maple Bread
This is the softest, most delicious homemade maple bread recipe you will ever bake, topped with a simple 4-ingredient maple syrup glaze!
Vegan Food & Recipes Feed
Chocolate Covered Katie Maple Bread This delicious maple bread recipe is irresistibly soft, fluffy, and packed with the flavors of warm maple syrup, vanilla and cinnamon sugar! https://chocolatecoveredkatie.com/wp-content/uploads/2026/10/Maple-Bread-With…
read is fantastic on its own, homemade maple icing makes it even better!
And it’s fast and easy to prepare, with just 4 ingredients. Simply whisk together powdered sugar, milk of choice, pure maple syrup, maple extract, and optional melted butter or plant based butter.
If the icing is too thick, slowly add more milk until it reaches your desired consistency.
Drizzle or spread generously over the top of the cooled maple bread, allowing the glaze to run down the sides.
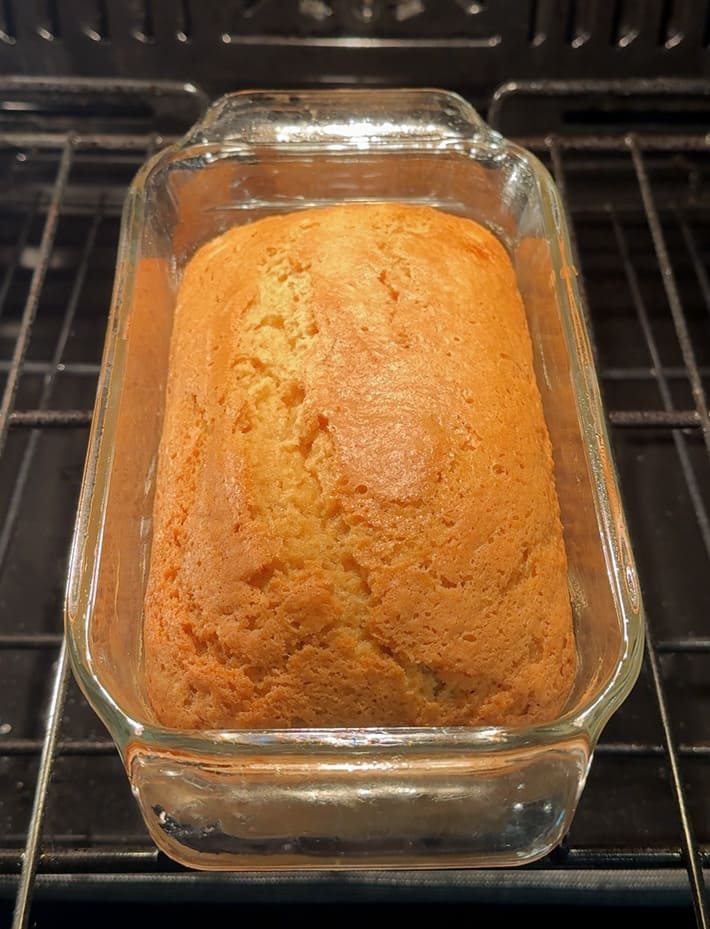
https://chocolatecoveredkatie.com/wp-content/uploads/2026/10/Maple-Quick-Bread-In-Oven.jpg How to make maple bread Step 1: Set the oven temperature. Preheat your oven to 350° Fahrenheit (176° Celsius). Grease a standard 9×5 inch loaf pan well, or line the bottom with parchment paper. Set this pan aside. Step 2: Combine dry ingredients. In a large mixing bowl, stir the flour, sugar, baking powder, salt, baking soda, and cinnamon. Step 3: Add wet ingredients. Whisk in the water, pure maple syrup, melted butter or oil, eggs or milk, pure vanilla extract, and maple extract. Stir just until evenly mixed and do not overbeat the batter. Step 4: Transfer to the pan. Use a spatula to smooth the mixture into your prepared loaf pan. Step 5: Bake. Place the pan on the oven’s center rack, and bake for forty minutes. Then test for doneness by inserting a toothpick into the center of the loaf. It is done when the toothpick comes out mostly clean. Step 6: Let cool. Carefully remove the pan from the oven, and let it fully cool on a wire rack on the counter. Then go around the sides carefully with a knife and pop it out onto a large serving plate. (You can frost and slice it directly in the loaf pan if you prefer.) Step 7: Serve and enjoy. The loaf is good on its own, but it’s even better iced with maple glaze. You can also spread maple butter, pumpkin butter, or almond butter on each slice. Sprinkle diced pecans or walnuts over the top if you wish. Step 8: Store the recipe. If you have any leftovers, store them loosely covered on the counter overnight. Both the taste and texture are even better the next day. After one day, cover leftovers and refrigerate or freeze for freshness. They should keep about five days in the refrigerator or up to three months when frozen. While the oven is hot, make Fall favorite Sweet Potato Brownies
https://chocolatecoveredkatie.com/wp-content/uploads/2026/11/Glazed-Maple-Loaf-Dessert.jpg Maple bread tips and troubleshooting
* Use pure maple syrup (not pancake syrup) and do not skip the maple extract.
* Measure the flour correctly. Loosely pack the measuring cup and level off any excess flour. If you want the most precise measurements, a kitchen food scale is recommended.
* Avoid overmixing the batter, which can lead to a tough or rubbery result.
* Start with room temperature ingredients. This helps the loaf cook more evenly and is especially important if you are using coconut oil, which hardens when cold.
* Turn the light on the oven to check the bread a few minutes before the written baking time. Climate, humidity, elevation, and an uncalibrated oven can all change the time a recipe needs to bake. If the top is browning too quickly while the inside is still gooey, add a foil tent and continue cooking.
https://chocolatecoveredkatie.com/wp-content/uploads/2026/10/Easy-Maple-Bread-Loaf-Fall-Breakfast-Or-Snack.png
https://chocolatecoveredkatie.com/wp-content/uploads/2026/11/Maple-Bread-Recipe-276x276.jpg <svg<g<pathPrint Maple Bread
<svg<defs<lineargradient<stop<stop<stop<stop<defs<lineargradient<stop<stop<stop<stop<defs<lineargradient<stop<stop<stop<stop
<svg<path<svg<path<svg<path<svg<path<svg<path Maple bread is the perfect cozy breakfast recipe for Fall, with a moist texture and bold maple flavor in each bite!
Course Breakfast, Dessert
Cuisine American
Keyword bread
Cook [...]
And it’s fast and easy to prepare, with just 4 ingredients. Simply whisk together powdered sugar, milk of choice, pure maple syrup, maple extract, and optional melted butter or plant based butter.
If the icing is too thick, slowly add more milk until it reaches your desired consistency.
Drizzle or spread generously over the top of the cooled maple bread, allowing the glaze to run down the sides.
https://chocolatecoveredkatie.com/wp-content/uploads/2026/10/Maple-Quick-Bread-In-Oven.jpg How to make maple bread Step 1: Set the oven temperature. Preheat your oven to 350° Fahrenheit (176° Celsius). Grease a standard 9×5 inch loaf pan well, or line the bottom with parchment paper. Set this pan aside. Step 2: Combine dry ingredients. In a large mixing bowl, stir the flour, sugar, baking powder, salt, baking soda, and cinnamon. Step 3: Add wet ingredients. Whisk in the water, pure maple syrup, melted butter or oil, eggs or milk, pure vanilla extract, and maple extract. Stir just until evenly mixed and do not overbeat the batter. Step 4: Transfer to the pan. Use a spatula to smooth the mixture into your prepared loaf pan. Step 5: Bake. Place the pan on the oven’s center rack, and bake for forty minutes. Then test for doneness by inserting a toothpick into the center of the loaf. It is done when the toothpick comes out mostly clean. Step 6: Let cool. Carefully remove the pan from the oven, and let it fully cool on a wire rack on the counter. Then go around the sides carefully with a knife and pop it out onto a large serving plate. (You can frost and slice it directly in the loaf pan if you prefer.) Step 7: Serve and enjoy. The loaf is good on its own, but it’s even better iced with maple glaze. You can also spread maple butter, pumpkin butter, or almond butter on each slice. Sprinkle diced pecans or walnuts over the top if you wish. Step 8: Store the recipe. If you have any leftovers, store them loosely covered on the counter overnight. Both the taste and texture are even better the next day. After one day, cover leftovers and refrigerate or freeze for freshness. They should keep about five days in the refrigerator or up to three months when frozen. While the oven is hot, make Fall favorite Sweet Potato Brownies
https://chocolatecoveredkatie.com/wp-content/uploads/2026/11/Glazed-Maple-Loaf-Dessert.jpg Maple bread tips and troubleshooting
* Use pure maple syrup (not pancake syrup) and do not skip the maple extract.
* Measure the flour correctly. Loosely pack the measuring cup and level off any excess flour. If you want the most precise measurements, a kitchen food scale is recommended.
* Avoid overmixing the batter, which can lead to a tough or rubbery result.
* Start with room temperature ingredients. This helps the loaf cook more evenly and is especially important if you are using coconut oil, which hardens when cold.
* Turn the light on the oven to check the bread a few minutes before the written baking time. Climate, humidity, elevation, and an uncalibrated oven can all change the time a recipe needs to bake. If the top is browning too quickly while the inside is still gooey, add a foil tent and continue cooking.
https://chocolatecoveredkatie.com/wp-content/uploads/2026/10/Easy-Maple-Bread-Loaf-Fall-Breakfast-Or-Snack.png
https://chocolatecoveredkatie.com/wp-content/uploads/2026/11/Maple-Bread-Recipe-276x276.jpg <svg<g<pathPrint Maple Bread
<svg<defs<lineargradient<stop<stop<stop<stop<defs<lineargradient<stop<stop<stop<stop<defs<lineargradient<stop<stop<stop<stop
<svg<path<svg<path<svg<path<svg<path<svg<path Maple bread is the perfect cozy breakfast recipe for Fall, with a moist texture and bold maple flavor in each bite!
Course Breakfast, Dessert
Cuisine American
Keyword bread
Cook [...]
Vegan Food & Recipes Feed
read is fantastic on its own, homemade maple icing makes it even better! And it’s fast and easy to prepare, with just 4 ingredients. Simply whisk together powdered sugar, milk of choice, pure maple syrup, maple extract, and optional melted butter or plant…
Time 40 minutes minutes
Total Time 40 minutes minutes
Servings 14 slices
Calories 130kcal
Author Katie Higgins Ingredients
* 2 cups flour (240g)
* 3/4 cup sugar (150g)
* 2 tsp baking powder (8g)
* 3/4 tsp salt
* 1/2 tsp baking soda
* 1/2 tsp ground cinnamon
* 3/4 cup water (180g)
* 1/4 cup pure maple syrup (60g)
* 3 tbsp oil or butter (36g)
* 1 tsp pure vanilla extract (5g)
* 1 tsp maple extract (5g)
* 2 eggs or flax eggs (or 1/2 cup milk of choice) Maple Glaze
* 3/4 cup powdered sugar (75g)
* 2 tbsp milk of choice (30g), or more if needed
* 1 tbsp pure maple syrup (15g)
* 1/4 tsp maple extract
* 1 tbsp butter (optional) Instructions
*
*The maple bread recipe works well with spelt flour, all purpose white flour, or all purpose gluten free flour.
*
1. Preheat oven to 350° Fahrenheit (176° Celsius). Grease a 9×5 inch loaf pan well, or line the bottom with parchment paper. Set aside.
*
2. Whisk flour, sugar, baking powder, salt, baking soda, and cinnamon in a large bowl. Then whisk in water, maple syrup, melted butter or oil, eggs or milk, vanilla extract, and maple extract until just evenly combined.
*
3. Smooth into the loaf pan, and bake on the center rack of the oven for 40 minutes or until a toothpick inserted into the center of the maple bread comes out mostly clean.
*
4. Meanwhile, make the optional maple glaze by whisking all glaze ingredients until thick and smooth. If too thin, slowly add in more powdered sugar. Or if too thick, add more milk.
*
5. Let the pan cool on a wire rack before popping the loaf out onto a serving plate and frosting with the maple glaze above or any toppings you wish. (You may also frost and slice the recipe directly in the loaf pan.)
*
6. Once cooled, slice and store leftovers on the counter for one night, in the refrigerator for up to five days, or frozen for up to three months.
* View Nutrition Facts Video Notes
The recipe was adapted from this Applesauce Cake. Nutrition
Serving: 1slice | Calories: 130kcal | Carbohydrates: 24g | Protein: 3.5g | Fat: 3g | Saturated Fat: 0.3g | Polyunsaturated Fat: 2g | Monounsaturated Fat: 0.7g | Sodium: 90mg | Potassium: 82mg | Fiber: 2.1g | Sugar: 11g | Vitamin A: 60IU | Vitamin C: 1mg | Calcium: 10mg | Iron: 1mg Easy Fall Breakfast Recipes https://chocolatecoveredkatie.com/wp-content/uploads/2023/08/Keto-Pumpkin-Muffin-Recipe-jpg.webp Flourless Pumpkin Muffins https://chocolatecoveredkatie.com/wp-content/uploads/2019/10/The-Best-Easy-Healthy-Applesauce-Muffins.jpg Applesauce Muffins https://chocolatecoveredkatie.com/wp-content/uploads/2026/09/Vegan-Protein-Pumpkin-Bread.jpg Protein Pumpkin Bread https://chocolatecoveredkatie.com/wp-content/uploads/2022/12/Quick-Easy-Cinnamon-Roll-Recipe-jpg.webp Easy Cinnamon Rolls https://chocolatecoveredkatie.com/wp-content/uploads/2023/09/Baked-Apple-Cider-Donuts-jpg.webp Baked Apple Cider Donuts https://chocolatecoveredkatie.com/wp-content/uploads/2024/11/Healthy-Breakfast-Oatmeal-Muffins.jpg Oatmeal Muffins https://chocolatecoveredkatie.com/wp-content/uploads/2022/12/Healthy-Cranberry-Orange-Bread-jpg.webp Cranberry Orange Bread https://chocolatecoveredkatie.com/wp-content/uploads/2011/09/The-Best-Cinnamon-Roll-Baked-Oatmeal-Recipe.jpg Cinnamon Roll Baked Oatmeal
The post Maple Bread appeared first on Chocolate Covered Katie.
➖ @VeganFoodFeed ➖
Total Time 40 minutes minutes
Servings 14 slices
Calories 130kcal
Author Katie Higgins Ingredients
* 2 cups flour (240g)
* 3/4 cup sugar (150g)
* 2 tsp baking powder (8g)
* 3/4 tsp salt
* 1/2 tsp baking soda
* 1/2 tsp ground cinnamon
* 3/4 cup water (180g)
* 1/4 cup pure maple syrup (60g)
* 3 tbsp oil or butter (36g)
* 1 tsp pure vanilla extract (5g)
* 1 tsp maple extract (5g)
* 2 eggs or flax eggs (or 1/2 cup milk of choice) Maple Glaze
* 3/4 cup powdered sugar (75g)
* 2 tbsp milk of choice (30g), or more if needed
* 1 tbsp pure maple syrup (15g)
* 1/4 tsp maple extract
* 1 tbsp butter (optional) Instructions
*
*The maple bread recipe works well with spelt flour, all purpose white flour, or all purpose gluten free flour.
*
1. Preheat oven to 350° Fahrenheit (176° Celsius). Grease a 9×5 inch loaf pan well, or line the bottom with parchment paper. Set aside.
*
2. Whisk flour, sugar, baking powder, salt, baking soda, and cinnamon in a large bowl. Then whisk in water, maple syrup, melted butter or oil, eggs or milk, vanilla extract, and maple extract until just evenly combined.
*
3. Smooth into the loaf pan, and bake on the center rack of the oven for 40 minutes or until a toothpick inserted into the center of the maple bread comes out mostly clean.
*
4. Meanwhile, make the optional maple glaze by whisking all glaze ingredients until thick and smooth. If too thin, slowly add in more powdered sugar. Or if too thick, add more milk.
*
5. Let the pan cool on a wire rack before popping the loaf out onto a serving plate and frosting with the maple glaze above or any toppings you wish. (You may also frost and slice the recipe directly in the loaf pan.)
*
6. Once cooled, slice and store leftovers on the counter for one night, in the refrigerator for up to five days, or frozen for up to three months.
* View Nutrition Facts Video Notes
The recipe was adapted from this Applesauce Cake. Nutrition
Serving: 1slice | Calories: 130kcal | Carbohydrates: 24g | Protein: 3.5g | Fat: 3g | Saturated Fat: 0.3g | Polyunsaturated Fat: 2g | Monounsaturated Fat: 0.7g | Sodium: 90mg | Potassium: 82mg | Fiber: 2.1g | Sugar: 11g | Vitamin A: 60IU | Vitamin C: 1mg | Calcium: 10mg | Iron: 1mg Easy Fall Breakfast Recipes https://chocolatecoveredkatie.com/wp-content/uploads/2023/08/Keto-Pumpkin-Muffin-Recipe-jpg.webp Flourless Pumpkin Muffins https://chocolatecoveredkatie.com/wp-content/uploads/2019/10/The-Best-Easy-Healthy-Applesauce-Muffins.jpg Applesauce Muffins https://chocolatecoveredkatie.com/wp-content/uploads/2026/09/Vegan-Protein-Pumpkin-Bread.jpg Protein Pumpkin Bread https://chocolatecoveredkatie.com/wp-content/uploads/2022/12/Quick-Easy-Cinnamon-Roll-Recipe-jpg.webp Easy Cinnamon Rolls https://chocolatecoveredkatie.com/wp-content/uploads/2023/09/Baked-Apple-Cider-Donuts-jpg.webp Baked Apple Cider Donuts https://chocolatecoveredkatie.com/wp-content/uploads/2024/11/Healthy-Breakfast-Oatmeal-Muffins.jpg Oatmeal Muffins https://chocolatecoveredkatie.com/wp-content/uploads/2022/12/Healthy-Cranberry-Orange-Bread-jpg.webp Cranberry Orange Bread https://chocolatecoveredkatie.com/wp-content/uploads/2011/09/The-Best-Cinnamon-Roll-Baked-Oatmeal-Recipe.jpg Cinnamon Roll Baked Oatmeal
The post Maple Bread appeared first on Chocolate Covered Katie.
➖ @VeganFoodFeed ➖

Vegan Richa
Upside-Down Mushroom Tarts
Plant-based upside-down mushroom tarts combine savory balsamic mushrooms and a cheesy white bean spread for a super easy, flavorful, and satisfying handheld appetizer. (soy-free and nut-free with easy gluten-free option. 10g protein and 5g fiber per serving)
https://www.veganricha.com/wp-content/uploads/2026/10/mushroom-tarts-drizzle.jpg
These mushroom tarts come together quickly. They look so fancy, but they take much less effort than making a whole tart, because you don’t need to cook the mushrooms beforehand, nor does the cheese mixture need to be cooked. They all just get mixed in a bowl, layered together, and then you put the pastry on top and bake.
https://www.veganricha.com/wp-content/uploads/2026/10/mushroom-tart-veganricha-2940.jpg
Upside down tarts have been trending, so I decided to make a version with mushrooms, onion, garlic, and balsamic. I top them with this creamy white bean spread, which will be our cheese substitute, like a Brie and Camembert sub. We’re making a white bean cheesy spread, layering them, and then baking them. They just come out so fabulously!
https://www.veganricha.com/wp-content/uploads/2026/10/mushroom-tart-veganricha-2948-1.jpg
These tarts are easy, they come together quickly, and they are handheld. That means they make a great appetizer. You won’t need to have more dishes out for appetizers, because guests can just pick them up.
https://www.veganricha.com/wp-content/uploads/2026/10/mushroom-tart-veganricha-2969.jpg
Upside-down mushroom tarts don’t need any extra cooking steps, which also means there is less time needed in the kitchen and less standing around. You can make the bean spread beforehand and slice up the mushrooms and onions and keep them all beforehand, then assemble and bake when needed.
https://www.veganricha.com/wp-content/uploads/2026/10/mushroom-tart-veganricha-2949.jpg
I like to serve these with some of the white bean cheese mix or spread left after making the tart. That creamy cheesiness is great with the crisp mushroom tart.
https://www.veganricha.com/wp-content/uploads/2026/10/Screenshot-2026-10-01-at-4.04.04-PM-copy-2.jpg
You can also top it with the cheese spread and a little bit of spiced maple, kind of like a hot honey situation. That’s a great balance with the savoriness. But if you like it entirely savory, that is also ultra delicious by itself.
Why You’ll Love Upside-Down Mushroom Tarts
* savory mushroom-garlic-balsamic filling
* creamy, cheesy white bean layer
* Easy hand held appetizer. No extra bowls and plates!
* No pre-cooking the fillings. Everything cooks together in the oven.
https://www.veganricha.com/wp-content/uploads/2026/10/Screenshot-2026-10-01-at-4.05.25-PM-copy-v.jpg
More Handheld Appetizers
* Chickpea Spinach Berbere Hand Pie
* Samosa Pies
* Creamy Mushroom Puffs
* Jalapeño Popper Pinwheels
Continue reading: Upside-Down Mushroom Tarts
The post Upside-Down Mushroom Tarts appeared first on Vegan Richa.
➖ @VeganFoodFeed ➖
Upside-Down Mushroom Tarts
Plant-based upside-down mushroom tarts combine savory balsamic mushrooms and a cheesy white bean spread for a super easy, flavorful, and satisfying handheld appetizer. (soy-free and nut-free with easy gluten-free option. 10g protein and 5g fiber per serving)
https://www.veganricha.com/wp-content/uploads/2026/10/mushroom-tarts-drizzle.jpg
These mushroom tarts come together quickly. They look so fancy, but they take much less effort than making a whole tart, because you don’t need to cook the mushrooms beforehand, nor does the cheese mixture need to be cooked. They all just get mixed in a bowl, layered together, and then you put the pastry on top and bake.
https://www.veganricha.com/wp-content/uploads/2026/10/mushroom-tart-veganricha-2940.jpg
Upside down tarts have been trending, so I decided to make a version with mushrooms, onion, garlic, and balsamic. I top them with this creamy white bean spread, which will be our cheese substitute, like a Brie and Camembert sub. We’re making a white bean cheesy spread, layering them, and then baking them. They just come out so fabulously!
https://www.veganricha.com/wp-content/uploads/2026/10/mushroom-tart-veganricha-2948-1.jpg
These tarts are easy, they come together quickly, and they are handheld. That means they make a great appetizer. You won’t need to have more dishes out for appetizers, because guests can just pick them up.
https://www.veganricha.com/wp-content/uploads/2026/10/mushroom-tart-veganricha-2969.jpg
Upside-down mushroom tarts don’t need any extra cooking steps, which also means there is less time needed in the kitchen and less standing around. You can make the bean spread beforehand and slice up the mushrooms and onions and keep them all beforehand, then assemble and bake when needed.
https://www.veganricha.com/wp-content/uploads/2026/10/mushroom-tart-veganricha-2949.jpg
I like to serve these with some of the white bean cheese mix or spread left after making the tart. That creamy cheesiness is great with the crisp mushroom tart.
https://www.veganricha.com/wp-content/uploads/2026/10/Screenshot-2026-10-01-at-4.04.04-PM-copy-2.jpg
You can also top it with the cheese spread and a little bit of spiced maple, kind of like a hot honey situation. That’s a great balance with the savoriness. But if you like it entirely savory, that is also ultra delicious by itself.
Why You’ll Love Upside-Down Mushroom Tarts
* savory mushroom-garlic-balsamic filling
* creamy, cheesy white bean layer
* Easy hand held appetizer. No extra bowls and plates!
* No pre-cooking the fillings. Everything cooks together in the oven.
https://www.veganricha.com/wp-content/uploads/2026/10/Screenshot-2026-10-01-at-4.05.25-PM-copy-v.jpg
More Handheld Appetizers
* Chickpea Spinach Berbere Hand Pie
* Samosa Pies
* Creamy Mushroom Puffs
* Jalapeño Popper Pinwheels
Continue reading: Upside-Down Mushroom Tarts
The post Upside-Down Mushroom Tarts appeared first on Vegan Richa.
➖ @VeganFoodFeed ➖
Vegan Richa
Upside-Down Mushroom Tarts
Upside-down mushroom tarts with balsamic mushrooms and cheesy filling are a super easy, flavorful, and satisfying handheld appetizer.
Chocolate Covered Katie Vegan Caramel Sauce Did you know that you can easily make your own delicious vegan caramel sauce from a can of coconut milk?
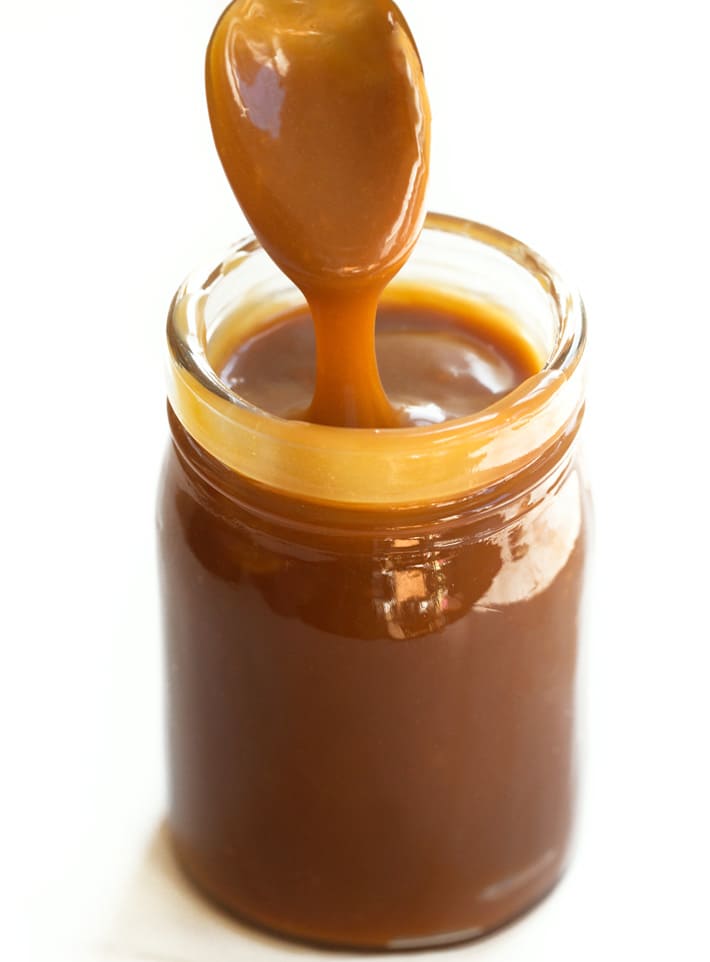
https://chocolatecoveredkatie.com/wp-content/uploads/2026/11/Coconut-Caramel-Sauce-Nondairy-Vegan.jpg https://chocolatecoveredkatie.com/wp-content/uploads/2015/09/pin-it-e1441245481357.png The best vegan caramel sauce
* You’ll fall in love with the thick, creamy texture.
* Naturally gluten free, egg free, and dairy free.
* Sweet, salty, and buttery flavor, made with just 3 ingredients.
* Absolutely no corn syrup and no vegan butter. You probably already have everything you need in the kitchen pantry to make it right now!
If you’ve been looking for an easy vegan caramel recipe that tastes just as decadent as traditional caramel, this is the one to try.
The coconut milk creates a smooth and silky sauce without heavy cream, while coconut sugar imparts a rich caramel flavor.
Unlike many other caramel sauce recipes, there’s no need for a candy thermometer or complicated techniques. And no dates or condensed milk here either.
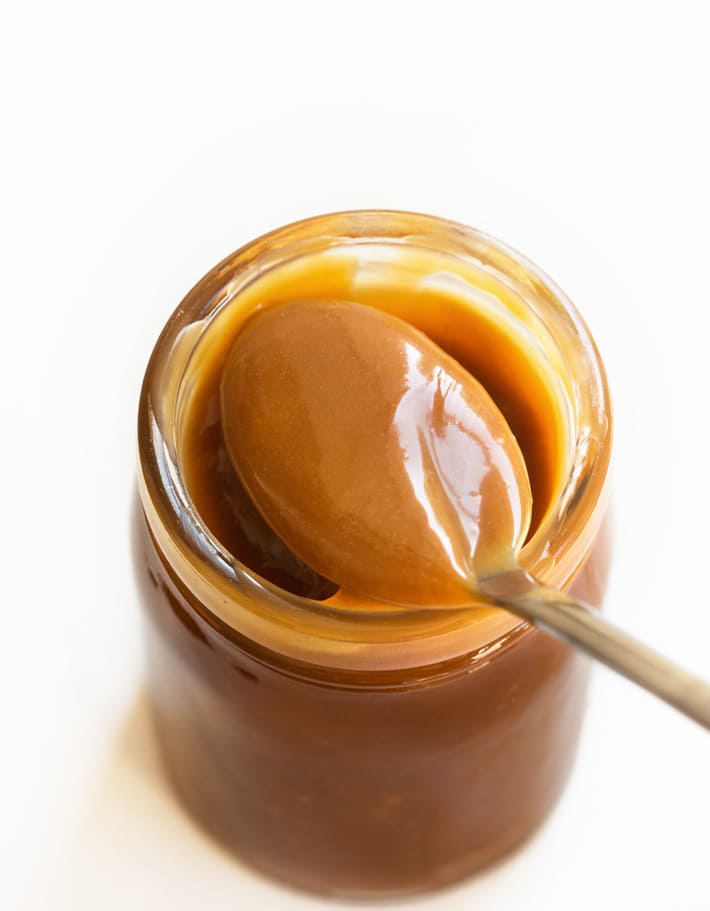
It’s perfect for dipping fresh apple slices, pouring over ice cream, iced coffee lattes, and other vegan desserts, or eating straight from the jar with a spoon. Try it on top of Healthy Apple Pie Step by step recipe video
I had a can of coconut cream that needed to be used, so luckily, I came across this recipe. It turned out great!!! I have it sitting in my fridge now and am doing my best NOT to eat it all. Thank you so much for this amazing recipe!
– Marielle Read More Reviews
https://chocolatecoveredkatie.com/wp-content/uploads/2026/11/Vegan-Caramel-Sauce-Ingredients.jpg Vegan caramel ingredients
From caramel apples, to grilled pineapple, to ice cream, dessert will never be the same. All you need to make the simple vegan recipe are coconut milk, sugar, salt, and optional vanilla extract. Coconut Milk: For the creamiest and thickest caramel dip, choose full fat canned coconut milk or coconut cream. Light coconut milk, almond milk, and oat milk are tasty but yield a much thinner consistency. Coconut Sugar: This unrefined sugar gives the homemade caramel its beautiful golden brown color and a deep, almost toffee-like flavor. You can use white or brown sugar, or pure maple syrup or agave if you prefer. Xylitol works well for a sugar free caramel. Salt: Include a fourth teaspoon of salt to balance the sweetness of the sugar, or increase to half a teaspoon for more of a vegan salted caramel taste. Vanilla Extract (optional): A small splash of pure vanilla extract adds yet another layer of warm flavor. It’s important to stir in the vanilla after turning off the heat.
https://chocolatecoveredkatie.com/wp-content/uploads/2017/03/caramel-recipe.jpg https://chocolatecoveredkatie.com/wp-content/uploads/2026/11/Homemade-Vegan-Caramel-Recipe.jpg How to make dairy free caramel sauce Step 1: Whisk ingredients. Add the entire can of coconut milk or coconut cream, coconut sugar, and salt to a medium saucepan. Turn the heat to medium, and whisk until sugar dissolves. Step 2: Bring to a boil. Stir occasionally until the liquid begins to boil. Once bubbling, allow the mixture to boil for about five minutes, stirring constantly and watching to ensure it does not boil over. Trust me, sticky caramel sauce on your stove top is not fun to clean! Step 3: Turn to low. Lower the heat to a simmer, and let the liquid cook down to about half its original volume, stirring as needed to prevent sticking. This step should take around forty to sixty minutes, and the caramel will look thick and lightly golden in color when finished. Step 4: Add the vanilla[...]
https://chocolatecoveredkatie.com/wp-content/uploads/2026/11/Coconut-Caramel-Sauce-Nondairy-Vegan.jpg https://chocolatecoveredkatie.com/wp-content/uploads/2015/09/pin-it-e1441245481357.png The best vegan caramel sauce
* You’ll fall in love with the thick, creamy texture.
* Naturally gluten free, egg free, and dairy free.
* Sweet, salty, and buttery flavor, made with just 3 ingredients.
* Absolutely no corn syrup and no vegan butter. You probably already have everything you need in the kitchen pantry to make it right now!
If you’ve been looking for an easy vegan caramel recipe that tastes just as decadent as traditional caramel, this is the one to try.
The coconut milk creates a smooth and silky sauce without heavy cream, while coconut sugar imparts a rich caramel flavor.
Unlike many other caramel sauce recipes, there’s no need for a candy thermometer or complicated techniques. And no dates or condensed milk here either.
It’s perfect for dipping fresh apple slices, pouring over ice cream, iced coffee lattes, and other vegan desserts, or eating straight from the jar with a spoon. Try it on top of Healthy Apple Pie Step by step recipe video
I had a can of coconut cream that needed to be used, so luckily, I came across this recipe. It turned out great!!! I have it sitting in my fridge now and am doing my best NOT to eat it all. Thank you so much for this amazing recipe!
– Marielle Read More Reviews
https://chocolatecoveredkatie.com/wp-content/uploads/2026/11/Vegan-Caramel-Sauce-Ingredients.jpg Vegan caramel ingredients
From caramel apples, to grilled pineapple, to ice cream, dessert will never be the same. All you need to make the simple vegan recipe are coconut milk, sugar, salt, and optional vanilla extract. Coconut Milk: For the creamiest and thickest caramel dip, choose full fat canned coconut milk or coconut cream. Light coconut milk, almond milk, and oat milk are tasty but yield a much thinner consistency. Coconut Sugar: This unrefined sugar gives the homemade caramel its beautiful golden brown color and a deep, almost toffee-like flavor. You can use white or brown sugar, or pure maple syrup or agave if you prefer. Xylitol works well for a sugar free caramel. Salt: Include a fourth teaspoon of salt to balance the sweetness of the sugar, or increase to half a teaspoon for more of a vegan salted caramel taste. Vanilla Extract (optional): A small splash of pure vanilla extract adds yet another layer of warm flavor. It’s important to stir in the vanilla after turning off the heat.
https://chocolatecoveredkatie.com/wp-content/uploads/2017/03/caramel-recipe.jpg https://chocolatecoveredkatie.com/wp-content/uploads/2026/11/Homemade-Vegan-Caramel-Recipe.jpg How to make dairy free caramel sauce Step 1: Whisk ingredients. Add the entire can of coconut milk or coconut cream, coconut sugar, and salt to a medium saucepan. Turn the heat to medium, and whisk until sugar dissolves. Step 2: Bring to a boil. Stir occasionally until the liquid begins to boil. Once bubbling, allow the mixture to boil for about five minutes, stirring constantly and watching to ensure it does not boil over. Trust me, sticky caramel sauce on your stove top is not fun to clean! Step 3: Turn to low. Lower the heat to a simmer, and let the liquid cook down to about half its original volume, stirring as needed to prevent sticking. This step should take around forty to sixty minutes, and the caramel will look thick and lightly golden in color when finished. Step 4: Add the vanilla[...]
Vegan Food & Recipes Feed
Chocolate Covered Katie Vegan Caramel Sauce Did you know that you can easily make your own delicious vegan caramel sauce from a can of coconut milk? https://chocolatecoveredkatie.com/wp-content/uploads/2026/11/Coconut-Caramel-Sauce-Nondairy-Vegan.jpg http…
. If using, whisk in the vanilla extract after removing the saucepan from the heat, to avoid burning the vanilla. Step 5: Cool and store. Let the plant based caramel sauce cool fully before transferring it to a covered jar or container. Refrigerate until cold, during which time it will thicken even more. Vegan caramel is delicious drizzled over a Frappuccino Recipe
https://chocolatecoveredkatie.com/wp-content/uploads/2026/11/Homemade-Dairy-Free-Caramel-Sauce-Dip.jpg Coconut caramel FAQ Does it taste like coconut?
Not really. The finished sauce may possess a subtle coconut flavor, depending on the brand of coconut milk you use. However, the coconut sugar, salt, and vanilla do a great job of masking the coconut, and I rarely taste coconut when I make this. Can I use maple syrup?
You can absolutely use pure maple syrup or agave, and the vegan dessert sauce still thickens the same amount as with a granulated sweetener. I personally just think it tastes more like classic caramel when using coconut sugar. Completely your choice! Can I use light coconut milk?
Light coconut milk contains more water, so you’ll get a much thinner sauce. If you do not mind, then yes it is fine to use light coconut milk or another nondairy milk. Is there a chocolate version?
If you are a fan of chocolate caramel, try the following variation of the recipe:
Simply whisk three tablespoons of sifted unsweetened cocoa powder into the coconut milk before heating on the stove top. It really is that easy. How do you store vegan caramel?
Let the sauce cool, then transfer it to a mason jar or covered container. Store leftovers in the refrigerator for up to a week. Or freeze for up to three months and reheat in a saucepan. Note that the texture of thawed frozen caramel will never be as creamy. Does the recipe work to make hard caramel candy? What about caramel apples?
The recipe below gives you a thick sauce that’s good for drizzling or spreading. It will not work to create hard vegan caramels.
It does work on caramel apples if you cook the caramel until it is super thick, not thin and runny. Wash the apples with vinegar and water to remove the wax coating that would cause the caramel sauce to slip off. Then add two coats of vegan caramel and refrigerate until ready to eat.
https://chocolatecoveredkatie.com/wp-content/uploads/2026/10/Vegan-Caramel-Sauce-With-Coconut-Milk.jpg How do you get thick vegan caramel?
Be sure to use full fat coconut milk. Or choose coconut cream for even faster, thicker results.
If the sauce still looks thin after heating forty minutes, continue to simmer another twenty minutes or so. It will further reduce as the water evaporates.
Finally, chill the caramel in the refrigerator after cooling. Coconut milk caramel thickens as it sits. If time permits, refrigerate in a jar or container overnight for a perfectly thick, smooth sauce the next day. Ways to use vegan caramel sauce
Drizzle it over nondairy frozen desserts, pancakes, waffles, oatmeal, brownies, or pretty much anything you can imagine. Below are four of my favorite uses for dairy free caramel. https://chocolatecoveredkatie.com/wp-content/uploads/2020/10/Apple-Bread-Recipe-600x600.jpg Apple Bread https://chocolatecoveredkatie.com/wp-content/uploads/2025/02/Vegan-Cheesecake-Recipe-600x600.jpg Vegan Cheesecake https://chocolatecoveredkatie.com/wp-content/uploads/2018/08/Almond-Milk-Ice-Cream-Vegan-Keto-Option-600x600.jpg Almond Milk Ice Cream https://chocolatecoveredkatie.com/wp-content/uploads/2022/11/Vegan-Brownies-600x600.jpg Vegan Brownies
https://chocolatecoveredkatie.com/wp-content/uploads/2026/11/Easy-Dairy-Free-Caramel-Sauce-No-Corn-Syrup.png
https://chocolatecoveredkatie.com/wp-content/uploads/2017/03/Vegan-Caramel-Sauce-Recipe-1-276x276.jpg <svg<g<pathPrint Vegan Caramel Sauce
<svg<defs<lineargradient<stop<stop<stop<stop<defs<lineargrad[...]
https://chocolatecoveredkatie.com/wp-content/uploads/2026/11/Homemade-Dairy-Free-Caramel-Sauce-Dip.jpg Coconut caramel FAQ Does it taste like coconut?
Not really. The finished sauce may possess a subtle coconut flavor, depending on the brand of coconut milk you use. However, the coconut sugar, salt, and vanilla do a great job of masking the coconut, and I rarely taste coconut when I make this. Can I use maple syrup?
You can absolutely use pure maple syrup or agave, and the vegan dessert sauce still thickens the same amount as with a granulated sweetener. I personally just think it tastes more like classic caramel when using coconut sugar. Completely your choice! Can I use light coconut milk?
Light coconut milk contains more water, so you’ll get a much thinner sauce. If you do not mind, then yes it is fine to use light coconut milk or another nondairy milk. Is there a chocolate version?
If you are a fan of chocolate caramel, try the following variation of the recipe:
Simply whisk three tablespoons of sifted unsweetened cocoa powder into the coconut milk before heating on the stove top. It really is that easy. How do you store vegan caramel?
Let the sauce cool, then transfer it to a mason jar or covered container. Store leftovers in the refrigerator for up to a week. Or freeze for up to three months and reheat in a saucepan. Note that the texture of thawed frozen caramel will never be as creamy. Does the recipe work to make hard caramel candy? What about caramel apples?
The recipe below gives you a thick sauce that’s good for drizzling or spreading. It will not work to create hard vegan caramels.
It does work on caramel apples if you cook the caramel until it is super thick, not thin and runny. Wash the apples with vinegar and water to remove the wax coating that would cause the caramel sauce to slip off. Then add two coats of vegan caramel and refrigerate until ready to eat.
https://chocolatecoveredkatie.com/wp-content/uploads/2026/10/Vegan-Caramel-Sauce-With-Coconut-Milk.jpg How do you get thick vegan caramel?
Be sure to use full fat coconut milk. Or choose coconut cream for even faster, thicker results.
If the sauce still looks thin after heating forty minutes, continue to simmer another twenty minutes or so. It will further reduce as the water evaporates.
Finally, chill the caramel in the refrigerator after cooling. Coconut milk caramel thickens as it sits. If time permits, refrigerate in a jar or container overnight for a perfectly thick, smooth sauce the next day. Ways to use vegan caramel sauce
Drizzle it over nondairy frozen desserts, pancakes, waffles, oatmeal, brownies, or pretty much anything you can imagine. Below are four of my favorite uses for dairy free caramel. https://chocolatecoveredkatie.com/wp-content/uploads/2020/10/Apple-Bread-Recipe-600x600.jpg Apple Bread https://chocolatecoveredkatie.com/wp-content/uploads/2025/02/Vegan-Cheesecake-Recipe-600x600.jpg Vegan Cheesecake https://chocolatecoveredkatie.com/wp-content/uploads/2018/08/Almond-Milk-Ice-Cream-Vegan-Keto-Option-600x600.jpg Almond Milk Ice Cream https://chocolatecoveredkatie.com/wp-content/uploads/2022/11/Vegan-Brownies-600x600.jpg Vegan Brownies
https://chocolatecoveredkatie.com/wp-content/uploads/2026/11/Easy-Dairy-Free-Caramel-Sauce-No-Corn-Syrup.png
https://chocolatecoveredkatie.com/wp-content/uploads/2017/03/Vegan-Caramel-Sauce-Recipe-1-276x276.jpg <svg<g<pathPrint Vegan Caramel Sauce
<svg<defs<lineargradient<stop<stop<stop<stop<defs<lineargrad[...]
Vegan Food & Recipes Feed
. If using, whisk in the vanilla extract after removing the saucepan from the heat, to avoid burning the vanilla. Step 5: Cool and store. Let the plant based caramel sauce cool fully before transferring it to a covered jar or container. Refrigerate until cold…
ient<stop<stop<stop<stop<defs<lineargradient<stop<stop<stop<stop
<svg<path<svg<path<svg<path<svg<path<svg<path This thick vegan caramel sauce is smooth, sweet, salty and made with just 3 ingredients!
Course Dessert, Snack
Cuisine American
Keyword caramel, coconut, coconut milk, easy, vegan
Cook Time 1 hour hour 10 minutes minutes
Total Time 1 hour hour 10 minutes minutes
Servings 1 cup
Calories 40kcal
Author Katie Higgins Ingredients
* 13.5 oz full fat coconut milk or coconut cream
* 2/3 cup coconut sugar (95g) (pure maple syrup, agave, brown sugar, or xylitol also work)
* 1/4 tsp salt
* 1/2 tsp pure vanilla extract (optional) Instructions
*
1. Stir canned coconut milk or coconut cream, sweetener, and salt in a saucepan over medium heat. Bring to a boil.
*
2. Once boiling, whisk continuously for 5 minutes. Watch the pot to make sure it does not boil over.
*
3. Turn the heat to a simmer, and cook 45-60 minutes or until the liquid thickens and reduces to about half its original volume. Stir occasionally during this time.
*
4. Remove the saucepan from the heat, then stir in the optional vanilla extract.
*
5. Let the vegan caramel sauce cool fully before transferring it to a covered container or jar. It is perfectly fine to use right away, or you can refrigerate overnight for a thicker texture.
* View Nutrition Facts Video Notes
It tastes absolutely amazing over homemade Coconut Ice Cream. Nutrition
Serving: 1tbsp | Calories: 40kcal | Carbohydrates: 1g | Protein: 0.4g | Fat: 4g | Saturated Fat: 3.2g | Polyunsaturated Fat: 0.8g | Sodium: 37mg | Potassium: 45mg | Fiber: 0.4g | Sugar: 0.4g | Calcium: 3mg More homemade vegan desserts https://chocolatecoveredkatie.com/wp-content/uploads/2022/01/Vegan-Chocolate-Chip-Cookies.jpg Vegan Chocolate Chip Cookies https://chocolatecoveredkatie.com/wp-content/uploads/2022/08/black-bean-brownie.jpg Black Bean Brownies https://chocolatecoveredkatie.com/wp-content/uploads/2020/03/The-Best-Vegan-Carrot-Cake-Recipe.jpg Vegan Carrot Cake https://chocolatecoveredkatie.com/wp-content/uploads/2020/04/Easy-Vegan-Dark-Chocolate-Mousse-Recipe.jpg Vegan Chocolate Mousse https://chocolatecoveredkatie.com/wp-content/uploads/2021/03/Chocolate-Chip-Chickpea-Blondie-Recipe.jpg Chickpea Blondies https://chocolatecoveredkatie.com/wp-content/uploads/2025/02/Homemade-Lemon-Curd-Easy-Recipe.jpg Vegan Lemon Curd https://chocolatecoveredkatie.com/wp-content/uploads/2024/12/English-Vegan-Toffee-Bark.jpg Vegan Toffee
The post Vegan Caramel Sauce appeared first on Chocolate Covered Katie.
➖ @VeganFoodFeed ➖
<svg<path<svg<path<svg<path<svg<path<svg<path This thick vegan caramel sauce is smooth, sweet, salty and made with just 3 ingredients!
Course Dessert, Snack
Cuisine American
Keyword caramel, coconut, coconut milk, easy, vegan
Cook Time 1 hour hour 10 minutes minutes
Total Time 1 hour hour 10 minutes minutes
Servings 1 cup
Calories 40kcal
Author Katie Higgins Ingredients
* 13.5 oz full fat coconut milk or coconut cream
* 2/3 cup coconut sugar (95g) (pure maple syrup, agave, brown sugar, or xylitol also work)
* 1/4 tsp salt
* 1/2 tsp pure vanilla extract (optional) Instructions
*
1. Stir canned coconut milk or coconut cream, sweetener, and salt in a saucepan over medium heat. Bring to a boil.
*
2. Once boiling, whisk continuously for 5 minutes. Watch the pot to make sure it does not boil over.
*
3. Turn the heat to a simmer, and cook 45-60 minutes or until the liquid thickens and reduces to about half its original volume. Stir occasionally during this time.
*
4. Remove the saucepan from the heat, then stir in the optional vanilla extract.
*
5. Let the vegan caramel sauce cool fully before transferring it to a covered container or jar. It is perfectly fine to use right away, or you can refrigerate overnight for a thicker texture.
* View Nutrition Facts Video Notes
It tastes absolutely amazing over homemade Coconut Ice Cream. Nutrition
Serving: 1tbsp | Calories: 40kcal | Carbohydrates: 1g | Protein: 0.4g | Fat: 4g | Saturated Fat: 3.2g | Polyunsaturated Fat: 0.8g | Sodium: 37mg | Potassium: 45mg | Fiber: 0.4g | Sugar: 0.4g | Calcium: 3mg More homemade vegan desserts https://chocolatecoveredkatie.com/wp-content/uploads/2022/01/Vegan-Chocolate-Chip-Cookies.jpg Vegan Chocolate Chip Cookies https://chocolatecoveredkatie.com/wp-content/uploads/2022/08/black-bean-brownie.jpg Black Bean Brownies https://chocolatecoveredkatie.com/wp-content/uploads/2020/03/The-Best-Vegan-Carrot-Cake-Recipe.jpg Vegan Carrot Cake https://chocolatecoveredkatie.com/wp-content/uploads/2020/04/Easy-Vegan-Dark-Chocolate-Mousse-Recipe.jpg Vegan Chocolate Mousse https://chocolatecoveredkatie.com/wp-content/uploads/2021/03/Chocolate-Chip-Chickpea-Blondie-Recipe.jpg Chickpea Blondies https://chocolatecoveredkatie.com/wp-content/uploads/2025/02/Homemade-Lemon-Curd-Easy-Recipe.jpg Vegan Lemon Curd https://chocolatecoveredkatie.com/wp-content/uploads/2024/12/English-Vegan-Toffee-Bark.jpg Vegan Toffee
The post Vegan Caramel Sauce appeared first on Chocolate Covered Katie.
➖ @VeganFoodFeed ➖

Minimalist Baker
No-Bake Cranberry Orange Bliss Bites
https://minimalistbaker.com/wp-content/uploads/2026/02/No-Bake-Cranberry-Bliss-Bar-Bites-8-680x1020.jpg Cozy, bright, and bursting with holiday flavor — these Cranberry Orange Bliss Bites are the perfect little treat when holiday baking season is in full swing and you’re out of time and energy. Inspired by Starbucks’ Bliss Bars, they pack the tart-sweet magic of cranberries and fresh orange zest into tender, no-bake bites you can whip up in minutes!
Even better? They’re vegan, gluten-free, and require zero baking — making them a lifesaver during the busy holiday season.
No-Bake Cranberry Orange Bliss Bites from Minimalist Baker →
➖ @VeganFoodFeed ➖
No-Bake Cranberry Orange Bliss Bites
https://minimalistbaker.com/wp-content/uploads/2026/02/No-Bake-Cranberry-Bliss-Bar-Bites-8-680x1020.jpg Cozy, bright, and bursting with holiday flavor — these Cranberry Orange Bliss Bites are the perfect little treat when holiday baking season is in full swing and you’re out of time and energy. Inspired by Starbucks’ Bliss Bars, they pack the tart-sweet magic of cranberries and fresh orange zest into tender, no-bake bites you can whip up in minutes!
Even better? They’re vegan, gluten-free, and require zero baking — making them a lifesaver during the busy holiday season.
No-Bake Cranberry Orange Bliss Bites from Minimalist Baker →
➖ @VeganFoodFeed ➖
Minimalist Baker
No-Bake Cranberry Orange Bliss Bites
Cozy, bright, and bursting with holiday flavor — these Cranberry Orange Bliss Bites are the perfect little treat when holiday baking season is in full
Chocolate Covered Katie
Apple Cinnamon Overnight Oats
Apple cinnamon overnight oats are thick, creamy, and packed with wonderful spiced Fall flavor!
https://chocolatecoveredkatie.com/wp-content/uploads/2026/10/Fall-Apple-Cinnamon-Overnight-Oats-With-Greek-Yogurt.jpg https://chocolatecoveredkatie.com/wp-content/uploads/2015/09/pin-it-e1441245481357.png The best apple cinnamon overnight oats recipe
* Great for meal prep. Whip up a big batch on Sunday, and you never have to think about what to make in the morning during the week. Simply wake up to enjoy an almost instant healthy breakfast each day.
* They taste like homemade apple pie in a jar! Sweet apples, spicy cinnamon, and warm vanilla give the recipe all the familiar flavors of classic apple pie.
* Just eight ingredients. You may already have everything you need in your kitchen.
* Easy to customize. Add peanut butter, walnuts, raisins, chia seeds, or your favorite protein powder. Plus, unlike store bought overnight oat containers, you get to control how much sugar to include.
* Filling and satisfying. With chewy, high fiber oats and high protein yogurt, this delicious recipe will keep you full for hours.
The number one secret to the absolute sweetest, most buttery apple overnight oats you’ve ever tasted is to use homemade sautéed cinnamon apples instead of raw apples. It’s one simple extra step that makes all the difference. You’ll also love these wholesome Applesauce Muffins Step by step recipe video
https://chocolatecoveredkatie.com/wp-content/uploads/2026/11/Apple-Cinnamon-Overnight-Oatmeal-Ingredients.jpg Ingredients for apple cinnamon overnight oats Apples – Choose a sweet and slightly tart, crisp apple variety. And try to avoid mushy apples from the grocery store, orchard, or farmer’s market. I love Pink Lady, Fuji, Granny Smith, Gala, or Honeycrisp apples here. Cinnamon – Ground cinnamon gives the recipe a cozy autumn sweet-spicy taste. Oats – Old fashioned rolled oats work best for overnight oat recipes, because they soften in liquids while still maintaining a chewy texture.
For gluten free apple cinnamon overnight oats, buy certified gluten free rolled oats. You can use quick oats or instant oats, although the consistency will be slightly more soft and mushy. Yogurt – Use any thick, smooth vanilla yogurt. As a vegan, I like dairy free coconut yogurt. It also works to swap up to a fourth cup of the Greek yogurt with applesauce, pumpkin puree, or mashed banana. Milk – Any milk is fine. Coconut milk or oat milk add extra creaminess. Or go with almond milk for a low calorie version. Chia Seeds – These tiny seeds absorb liquid as the jars sit in the refrigerator, ensuring the finished recipe is extra creamy. They are also nutrition superfoods, with fiber, iron, healthy fats, and calcium. Maple Syrup – Unrefined pure maple syrup compliments the cinnamon, apples, and vanilla. You can use brown sugar or a sugar free alternative if you prefer. Almond Butter – Add an optional tablespoon of almond butter (or cashew butter) per serving if you want a richer, creamier result. Other Ingredients – The recipe also calls for a pinch of salt, optional coconut oil or butter for sautéing, and optional protein powder.
https://chocolatecoveredkatie.com/wp-content/uploads/2026/10/Apple-Pie-Overnight-Oatmeal.jpg Apple cinnamon overnight oat health benefits
* Very high in fiber
* Over 30g protein
* Good source of calcium, iron, and potassium
* No sugar added option
* Contains healthy probiotics and prebiotics
* High in vitamin C
https://chocolatecoveredkatie.com/wp-content/uploads/2026/11/Apple-Oats-[...]
Apple Cinnamon Overnight Oats
Apple cinnamon overnight oats are thick, creamy, and packed with wonderful spiced Fall flavor!
https://chocolatecoveredkatie.com/wp-content/uploads/2026/10/Fall-Apple-Cinnamon-Overnight-Oats-With-Greek-Yogurt.jpg https://chocolatecoveredkatie.com/wp-content/uploads/2015/09/pin-it-e1441245481357.png The best apple cinnamon overnight oats recipe
* Great for meal prep. Whip up a big batch on Sunday, and you never have to think about what to make in the morning during the week. Simply wake up to enjoy an almost instant healthy breakfast each day.
* They taste like homemade apple pie in a jar! Sweet apples, spicy cinnamon, and warm vanilla give the recipe all the familiar flavors of classic apple pie.
* Just eight ingredients. You may already have everything you need in your kitchen.
* Easy to customize. Add peanut butter, walnuts, raisins, chia seeds, or your favorite protein powder. Plus, unlike store bought overnight oat containers, you get to control how much sugar to include.
* Filling and satisfying. With chewy, high fiber oats and high protein yogurt, this delicious recipe will keep you full for hours.
The number one secret to the absolute sweetest, most buttery apple overnight oats you’ve ever tasted is to use homemade sautéed cinnamon apples instead of raw apples. It’s one simple extra step that makes all the difference. You’ll also love these wholesome Applesauce Muffins Step by step recipe video
https://chocolatecoveredkatie.com/wp-content/uploads/2026/11/Apple-Cinnamon-Overnight-Oatmeal-Ingredients.jpg Ingredients for apple cinnamon overnight oats Apples – Choose a sweet and slightly tart, crisp apple variety. And try to avoid mushy apples from the grocery store, orchard, or farmer’s market. I love Pink Lady, Fuji, Granny Smith, Gala, or Honeycrisp apples here. Cinnamon – Ground cinnamon gives the recipe a cozy autumn sweet-spicy taste. Oats – Old fashioned rolled oats work best for overnight oat recipes, because they soften in liquids while still maintaining a chewy texture.
For gluten free apple cinnamon overnight oats, buy certified gluten free rolled oats. You can use quick oats or instant oats, although the consistency will be slightly more soft and mushy. Yogurt – Use any thick, smooth vanilla yogurt. As a vegan, I like dairy free coconut yogurt. It also works to swap up to a fourth cup of the Greek yogurt with applesauce, pumpkin puree, or mashed banana. Milk – Any milk is fine. Coconut milk or oat milk add extra creaminess. Or go with almond milk for a low calorie version. Chia Seeds – These tiny seeds absorb liquid as the jars sit in the refrigerator, ensuring the finished recipe is extra creamy. They are also nutrition superfoods, with fiber, iron, healthy fats, and calcium. Maple Syrup – Unrefined pure maple syrup compliments the cinnamon, apples, and vanilla. You can use brown sugar or a sugar free alternative if you prefer. Almond Butter – Add an optional tablespoon of almond butter (or cashew butter) per serving if you want a richer, creamier result. Other Ingredients – The recipe also calls for a pinch of salt, optional coconut oil or butter for sautéing, and optional protein powder.
https://chocolatecoveredkatie.com/wp-content/uploads/2026/10/Apple-Pie-Overnight-Oatmeal.jpg Apple cinnamon overnight oat health benefits
* Very high in fiber
* Over 30g protein
* Good source of calcium, iron, and potassium
* No sugar added option
* Contains healthy probiotics and prebiotics
* High in vitamin C
https://chocolatecoveredkatie.com/wp-content/uploads/2026/11/Apple-Oats-[...]
Chocolate Covered Katie
Apple Cinnamon Overnight Oats
With sweet apples and warm cinnamon spice, this healthy apple cinnamon overnight oats recipe is the perfect easy breakfast for busy mornings!
Vegan Food & Recipes Feed
Chocolate Covered Katie Apple Cinnamon Overnight Oats Apple cinnamon overnight oats are thick, creamy, and packed with wonderful spiced Fall flavor! https://chocolatecoveredkatie.com/wp-content/uploads/2026/10/Fall-Apple-Cinnamon-Overnight-Oats-With-Greek…
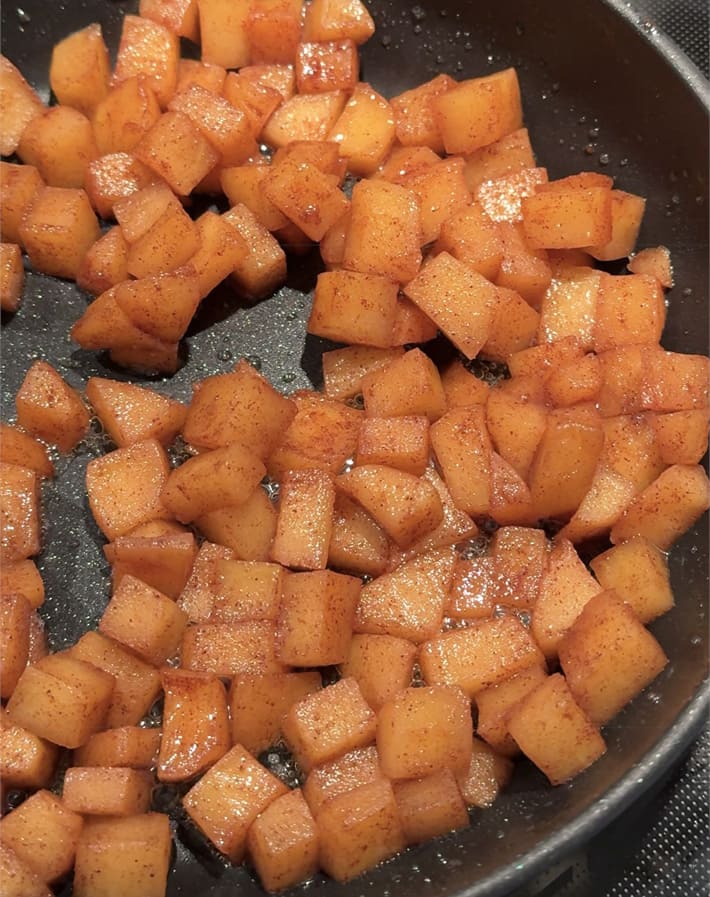
With-Greek-Yogurt.jpg How to make apple cinnamon overnight oats Step 1: Combine the ingredients. Stir the rolled oats, protein powder, chia seeds, half teaspoon ground cinnamon, and fourth teaspoon salt in a large measuring cup. Then whisk in the milk, two tablespoons sweetener, and three fourths cup of the yogurt until smooth. Step 2: Refrigerate overnight. Cover the oats and chill in the refrigerator overnight (or at least six hours). The chia seeds and oats will absorb excess liquid as the mixture sits, leaving you with magically thick, fluffy oatmeal the next day. Step 3: Cook the apples. Peel the raw apple if desired, or leave the peel on for more fiber. Then dice the fruit into small cubes. Stir chopped apples with the remaining maple syrup, cinnamon, salt, and coconut oil or butter (or water) in a frying pan or saucepan over medium heat. Add more water or oil if needed to prevent sticking, and stir frequently until soft. Step 4: Layer the oats. Divide the thickened cinnamon overnight oats evenly into two mason jars or bowls. Spread the remaining yogurt over the oats. Then layer the sautéed apples on top. You can also stir some of the apples into the oats. Step 5: Eat with a spoon. Enjoy your very own Fall cinnamon apple oatmeal breakfast parfait either hot or cold. Or serve for dessert, topped with Coconut Ice Cream. Hey, why not?! Step 6: Refrigerate leftovers. Store any leftover oatmeal in a covered container in the refrigerator for up to four days. You can also freeze the recipe, although the texture will not be as smooth and creamy. Meal prep apple oatmeal
Feeding a large family or meal prepping for the week?
Feel free to double, triple, or even quadruple the recipe to yield a larger serving.
Simply increase all ingredients based on the amount of servings you need. Be sure to use a large pan to cook the apples, so they will caramelize instead of steam.
https://chocolatecoveredkatie.com/wp-content/uploads/2026/11/Cinnamon-Sauteed-Apples-Recipe.jpg Why sauté the apples?
Cooking the chopped apples with cinnamon caramelizes the fruit, bringing out its natural sweetness.
The sautéing process breaks down the starch and releases pectin, which gives sautéed apples a soft, tender texture just like baked apple pie filling.
Layer the hot apples over the creamy oats, and it tastes like eating dessert for breakfast.
Feel free to cook the apples a day or two in advance to save time. Let cool, then store them tightly covered in the refrigerator until ready to use.
Honestly, these cinnamon apples are so good that you might want to make extras to spoon over pancakes, ice cream, Vegan French Toast, or Protein Waffles. My favorite variations on the recipe
I make this overnight apple oatmeal often in the Fall and winter for my husband and myself. To keep from getting bored, I like to change up the mix-ins and create new custom flavors from the base. Directly below are our four favorites. Caramel Apple: Drizzle date caramel or my Vegan Caramel Sauce over the apples just before serving. Or mix a tablespoon directly into the yogurt. Finish with a sprinkle of flaky sea salt. Maple Pecan: Stir an eighth teaspoon of maple extract and a handful of diced pecans into the overnight oatmeal before refrigerating. Garnish with roasted whole pecans. Apple Crumble: Instead of sautéed apples, top the thickened oats with a generous scoop of homemade Healthy Apple Crumble. Apple Cheesecake: Stir two tablespoons cream cheese or plant based cream cheese into the yogurt before layering it on top of the oats. To with crushed graham crackers.
https://chocolatecoveredkatie.com/wp-content/uploads/2026/10/Healthy-Apple-Cinnamon-Oatmeal-Overnight.png
https://chocolatecoveredkatie.com/wp-content/uploads/2026/10/Apple-Cinnamon-Overnight-Oats-Recipe-276x276.jpg <svg<g<pathPrint Apple Cinnamon Overnight Oats
<svg<defs<lineargradient<stop<stop<stop[...]
Feeding a large family or meal prepping for the week?
Feel free to double, triple, or even quadruple the recipe to yield a larger serving.
Simply increase all ingredients based on the amount of servings you need. Be sure to use a large pan to cook the apples, so they will caramelize instead of steam.
https://chocolatecoveredkatie.com/wp-content/uploads/2026/11/Cinnamon-Sauteed-Apples-Recipe.jpg Why sauté the apples?
Cooking the chopped apples with cinnamon caramelizes the fruit, bringing out its natural sweetness.
The sautéing process breaks down the starch and releases pectin, which gives sautéed apples a soft, tender texture just like baked apple pie filling.
Layer the hot apples over the creamy oats, and it tastes like eating dessert for breakfast.
Feel free to cook the apples a day or two in advance to save time. Let cool, then store them tightly covered in the refrigerator until ready to use.
Honestly, these cinnamon apples are so good that you might want to make extras to spoon over pancakes, ice cream, Vegan French Toast, or Protein Waffles. My favorite variations on the recipe
I make this overnight apple oatmeal often in the Fall and winter for my husband and myself. To keep from getting bored, I like to change up the mix-ins and create new custom flavors from the base. Directly below are our four favorites. Caramel Apple: Drizzle date caramel or my Vegan Caramel Sauce over the apples just before serving. Or mix a tablespoon directly into the yogurt. Finish with a sprinkle of flaky sea salt. Maple Pecan: Stir an eighth teaspoon of maple extract and a handful of diced pecans into the overnight oatmeal before refrigerating. Garnish with roasted whole pecans. Apple Crumble: Instead of sautéed apples, top the thickened oats with a generous scoop of homemade Healthy Apple Crumble. Apple Cheesecake: Stir two tablespoons cream cheese or plant based cream cheese into the yogurt before layering it on top of the oats. To with crushed graham crackers.
https://chocolatecoveredkatie.com/wp-content/uploads/2026/10/Healthy-Apple-Cinnamon-Oatmeal-Overnight.png
https://chocolatecoveredkatie.com/wp-content/uploads/2026/10/Apple-Cinnamon-Overnight-Oats-Recipe-276x276.jpg <svg<g<pathPrint Apple Cinnamon Overnight Oats
<svg<defs<lineargradient<stop<stop<stop[...]
Vegan Food & Recipes Feed
With-Greek-Yogurt.jpg How to make apple cinnamon overnight oats Step 1: Combine the ingredients. Stir the rolled oats, protein powder, chia seeds, half teaspoon ground cinnamon, and fourth teaspoon salt in a large measuring cup. Then whisk in the milk, two…
<stop<defs<lineargradient<stop<stop<stop<stop<defs<lineargradient<stop<stop<stop<stop
<svg<path<svg<path<svg<path<svg<path<svg<path These apple cinnamon overnight oats are topped with delicious sautéed apples and taste like homemade apple pie in a jar!
Course Breakfast
Cuisine American
Keyword apple, oatmeal, oats
Prep Time 5 minutes minutes
Cook Time 10 minutes minutes
Total Time 15 minutes minutes
Servings 2 servings
Calories 332kcal
Author Katie Higgins Ingredients
* 1 cup rolled oats (90g)
* 3 tbsp protein powder (24g) (optional)
* 2 tsp chia seeds (8g)
* 1/2 tsp ground cinnamon (2g)
* 1/4 tsp salt
* 1 cup milk of choice (240g)
* 1 cup vanilla yogurt or dairy free yogurt (240g)
* 2 tbsp pure maple syrup or sweetener of choice (30g)
* 2 tbsp almond butter (30g) (optional) Sautéed Cinnamon Apples
* 1 medium apple
* 1 tbsp pure maple syrup or sweetener of choice (15g)
* 2 tbsp coconut oil or butter (24g) (substitute water for low fat)
* 1/2 tsp ground cinnamon (2g)
* 1/8 tsp salt Instructions
*
1. Stir oats, chia seeds, 1/2 tsp cinnamon, 1/4 tsp salt, and optional protein powder in a large measuring cup. Then whisk in milk, sweetener, and 3/4 cup of the yogurt.
*
2. Cover and refrigerate overnight, during which time the mixture will thicken considerably.
*
3. Meanwhile, dice the apples. Stir with the oil or water and remaining cinnamon, maple syrup, and salt in a saucepan or frying pan over medium heat.
*
4. Stir the sautéed apples frequently until soft, and add more water or oil if needed to prevent sticking.
*
5. When ready to serve, layer the apple cinnamon overnight oats, remaining yogurt, and cooked apples in mason jars or bowls. Enjoy hot or cold.
*
6. Store leftovers covered in the refrigerator for up to four days.
* View Nutrition Facts Video Notes
Adapted from these Pistachio Overnight Oats and my Tiramisu Overnight Oats. Nutrition
Serving: 1serving | Calories: 332kcal | Carbohydrates: 41g | Protein: 30.5g | Fat: 6g | Saturated Fat: 0.9g | Polyunsaturated Fat: 3.1g | Monounsaturated Fat: 2g | Sodium: 280mg | Potassium: 578mg | Fiber: 11.5g | Sugar: 6g | Vitamin A: 200IU | Vitamin C: 5mg | Calcium: 435mg | Iron: 4mg More overnight oats recipes https://chocolatecoveredkatie.com/wp-content/uploads/2023/04/Vegan-Peanut-Butter-Overnight-Oats-jpg.webp Peanut Butter Overnight Oats https://chocolatecoveredkatie.com/wp-content/uploads/2025/01/The-Best-Chocolate-Overnight-Oats.jpg Chocolate Overnight Oats https://chocolatecoveredkatie.com/wp-content/uploads/2017/09/overnight-breakfast-cookie.jpg Overnight Breakfast Cookie https://chocolatecoveredkatie.com/wp-content/uploads/2025/05/Breakfast-Overnight-Oats-With-Protein-Powder.jpg Protein Overnight Oats https://chocolatecoveredkatie.com/wp-content/uploads/2025/02/Blueberry-Overnight-Oats-In-A-Jar.jpg Blueberry Overnight Oats
The post Apple Cinnamon Overnight Oats appeared first on Chocolate Covered Katie.
➖ @VeganFoodFeed ➖
<svg<path<svg<path<svg<path<svg<path<svg<path These apple cinnamon overnight oats are topped with delicious sautéed apples and taste like homemade apple pie in a jar!
Course Breakfast
Cuisine American
Keyword apple, oatmeal, oats
Prep Time 5 minutes minutes
Cook Time 10 minutes minutes
Total Time 15 minutes minutes
Servings 2 servings
Calories 332kcal
Author Katie Higgins Ingredients
* 1 cup rolled oats (90g)
* 3 tbsp protein powder (24g) (optional)
* 2 tsp chia seeds (8g)
* 1/2 tsp ground cinnamon (2g)
* 1/4 tsp salt
* 1 cup milk of choice (240g)
* 1 cup vanilla yogurt or dairy free yogurt (240g)
* 2 tbsp pure maple syrup or sweetener of choice (30g)
* 2 tbsp almond butter (30g) (optional) Sautéed Cinnamon Apples
* 1 medium apple
* 1 tbsp pure maple syrup or sweetener of choice (15g)
* 2 tbsp coconut oil or butter (24g) (substitute water for low fat)
* 1/2 tsp ground cinnamon (2g)
* 1/8 tsp salt Instructions
*
1. Stir oats, chia seeds, 1/2 tsp cinnamon, 1/4 tsp salt, and optional protein powder in a large measuring cup. Then whisk in milk, sweetener, and 3/4 cup of the yogurt.
*
2. Cover and refrigerate overnight, during which time the mixture will thicken considerably.
*
3. Meanwhile, dice the apples. Stir with the oil or water and remaining cinnamon, maple syrup, and salt in a saucepan or frying pan over medium heat.
*
4. Stir the sautéed apples frequently until soft, and add more water or oil if needed to prevent sticking.
*
5. When ready to serve, layer the apple cinnamon overnight oats, remaining yogurt, and cooked apples in mason jars or bowls. Enjoy hot or cold.
*
6. Store leftovers covered in the refrigerator for up to four days.
* View Nutrition Facts Video Notes
Adapted from these Pistachio Overnight Oats and my Tiramisu Overnight Oats. Nutrition
Serving: 1serving | Calories: 332kcal | Carbohydrates: 41g | Protein: 30.5g | Fat: 6g | Saturated Fat: 0.9g | Polyunsaturated Fat: 3.1g | Monounsaturated Fat: 2g | Sodium: 280mg | Potassium: 578mg | Fiber: 11.5g | Sugar: 6g | Vitamin A: 200IU | Vitamin C: 5mg | Calcium: 435mg | Iron: 4mg More overnight oats recipes https://chocolatecoveredkatie.com/wp-content/uploads/2023/04/Vegan-Peanut-Butter-Overnight-Oats-jpg.webp Peanut Butter Overnight Oats https://chocolatecoveredkatie.com/wp-content/uploads/2025/01/The-Best-Chocolate-Overnight-Oats.jpg Chocolate Overnight Oats https://chocolatecoveredkatie.com/wp-content/uploads/2017/09/overnight-breakfast-cookie.jpg Overnight Breakfast Cookie https://chocolatecoveredkatie.com/wp-content/uploads/2025/05/Breakfast-Overnight-Oats-With-Protein-Powder.jpg Protein Overnight Oats https://chocolatecoveredkatie.com/wp-content/uploads/2025/02/Blueberry-Overnight-Oats-In-A-Jar.jpg Blueberry Overnight Oats
The post Apple Cinnamon Overnight Oats appeared first on Chocolate Covered Katie.
➖ @VeganFoodFeed ➖

I Ate Perfectly and Still Got Cancer: What a Plant-Based Diet Can & Cannot Do | Dr. Alan Goldhamer
I Ate Perfectly and Still Got Cancer: What a Plant-Based Diet Can & Cannot Do | Dr. Alan Goldhamer - YouTubeI Ate Perfectly and Still Got Cancer: What a Plant-Based Diet Can & Cannot Do | Dr. Alan Goldhamer - YouTube
I Ate Perfectly and Still Got Cancer: What a Plant-Based Diet Can & Cannot Do | Dr. Alan Goldhamer - YouTubeI Ate Perfectly and Still Got Cancer: What a Plant-Based Diet Can & Cannot Do | Dr. Alan Goldhamer - YouTube
Vegan Richa
Roasted Honeynut Squash with Lemon Chickpea Whip and Toasted Pine Nuts
If fall was a dinner, this would be it: maple-Dijon roasted Honeynut squash over a creamy, lemony whipped chickpeas and topped with buttery toasted pine nuts. (gluten-free, with soy-free & nut-free options. 12g each protein and fiber per serving)
https://www.veganricha.com/wp-content/uploads/2026/10/roasted-honeynut-bean-puree-VeganRicha-2835.jpg
It has this amazingly delicious roasted honeynut squash with that fantastic glaze of maple, Dijon, Aleppo pepper flakes, and thyme. The glaze is just so mind-blowingly amazing on that squash.
We pair the roasted squash with this creamy lemony chickpea puree, which gets whipped up in a food processor. You can also use a blender. That tangy, refreshing, herby freshness from the chickpeas pairs amazingly with the squash.
https://www.veganricha.com/wp-content/uploads/2026/09/Screenshot-2026-10-02-at-1.46.43-PM-copy.jpg Screenshot
To add some texture, we add some toasted pine nuts and some fresh herbs on top. Use toasted almond slivers, pecans or pumpkin seeds for variation. It comes together fairly quickly and it is delicious.
This roasted squash platter packs 48 grams of protein and fiber! You can add even more protein, by adding some more toppings like hemp seeds. You can serve it over quinoa or farro. Some toasted quinoa would be great with this, or some multigrain bread, garlic bread, or toasted pita bread. Any of these sides will also bump up the protein and fiber.
https://www.veganricha.com/wp-content/uploads/2026/10/roasted-honeynut-bean-puree-veganricha-2826-crop.jpg
To cook the squash and get all of that amazing caramelization, we bake it with that glaze, which causes this Maillard reaction with the protein and the sugars. They react under the heat, producing this deeply caramelized flavor.
To make things simple, I’m roasting the entire squash first, because it’s just so hard to cut up squashes. The honeynut squash is a lot easier to slice, so you can slice them in half and bake them, but if you don’t want to do that, just brush them with a little bit of oil and throw them in the oven until they are tender.
https://www.veganricha.com/wp-content/uploads/2026/09/roasted-honeynut-bean-puree-veganricha-2825.jpg https://www.veganricha.com/wp-content/uploads/2026/09/roasted-honeynut-bean-puree-veganricha-2805.jpg
Then, we slice them and glaze them and bake them again. This way, it’s easy to cut them up, and easy to scoop the seeds. Everything just becomes easier with that initial bake.
For the chickpea whip, we combine all the ingredients in the food processor and process, and that’s about it. Toast the pine nuts and then just plate these together however you like.
https://www.veganricha.com/wp-content/uploads/2026/09/roasted-honeynut-bean-puree-veganricha-2834.jpg Why You’ll Love Roasted Honeynut Squash
* perfect holiday or other special occasion main dish
* sweet-and-savory roasted winter squash with maple Dijon glaze
* protein-packed, creamy lemon chickpea whip
* lots of fresh herbs and crunchy nuts or seeds on top
* easy to make! While the squash roasts, make the 1-bowl glaze, food processor chickpea whip, and prepare any other toppings you like
* naturally gluten-free and soy-free with easy nut-free option
https://www.veganricha.com/wp-content/uploads/2026/10/roasted-honeynut-bean-puree-veganricha-2833.jpg More Winter Squash Recipes
* Delicata Squash Casserole
* Berbere Roated Kabocha Squash
* Pressure Cooker Curried Stuffed Acorn Squash
* Lentil, Apple, and Pecan-Stuffed butternut Squash Continue reading: Roasted Honeynut Squash with Lemon Chickpea Whip and Toasted Pine Nuts
The post Roasted Honeynut Squash with Lemon Chickpea Whip and Toasted Pine Nuts appeared first on Vegan Richa.
➖ Sent by @TheFeedReaderBot ➖
➖ @VeganFoodFeed ➖
Roasted Honeynut Squash with Lemon Chickpea Whip and Toasted Pine Nuts
If fall was a dinner, this would be it: maple-Dijon roasted Honeynut squash over a creamy, lemony whipped chickpeas and topped with buttery toasted pine nuts. (gluten-free, with soy-free & nut-free options. 12g each protein and fiber per serving)
https://www.veganricha.com/wp-content/uploads/2026/10/roasted-honeynut-bean-puree-VeganRicha-2835.jpg
It has this amazingly delicious roasted honeynut squash with that fantastic glaze of maple, Dijon, Aleppo pepper flakes, and thyme. The glaze is just so mind-blowingly amazing on that squash.
We pair the roasted squash with this creamy lemony chickpea puree, which gets whipped up in a food processor. You can also use a blender. That tangy, refreshing, herby freshness from the chickpeas pairs amazingly with the squash.
https://www.veganricha.com/wp-content/uploads/2026/09/Screenshot-2026-10-02-at-1.46.43-PM-copy.jpg Screenshot
To add some texture, we add some toasted pine nuts and some fresh herbs on top. Use toasted almond slivers, pecans or pumpkin seeds for variation. It comes together fairly quickly and it is delicious.
This roasted squash platter packs 48 grams of protein and fiber! You can add even more protein, by adding some more toppings like hemp seeds. You can serve it over quinoa or farro. Some toasted quinoa would be great with this, or some multigrain bread, garlic bread, or toasted pita bread. Any of these sides will also bump up the protein and fiber.
https://www.veganricha.com/wp-content/uploads/2026/10/roasted-honeynut-bean-puree-veganricha-2826-crop.jpg
To cook the squash and get all of that amazing caramelization, we bake it with that glaze, which causes this Maillard reaction with the protein and the sugars. They react under the heat, producing this deeply caramelized flavor.
To make things simple, I’m roasting the entire squash first, because it’s just so hard to cut up squashes. The honeynut squash is a lot easier to slice, so you can slice them in half and bake them, but if you don’t want to do that, just brush them with a little bit of oil and throw them in the oven until they are tender.
https://www.veganricha.com/wp-content/uploads/2026/09/roasted-honeynut-bean-puree-veganricha-2825.jpg https://www.veganricha.com/wp-content/uploads/2026/09/roasted-honeynut-bean-puree-veganricha-2805.jpg
Then, we slice them and glaze them and bake them again. This way, it’s easy to cut them up, and easy to scoop the seeds. Everything just becomes easier with that initial bake.
For the chickpea whip, we combine all the ingredients in the food processor and process, and that’s about it. Toast the pine nuts and then just plate these together however you like.
https://www.veganricha.com/wp-content/uploads/2026/09/roasted-honeynut-bean-puree-veganricha-2834.jpg Why You’ll Love Roasted Honeynut Squash
* perfect holiday or other special occasion main dish
* sweet-and-savory roasted winter squash with maple Dijon glaze
* protein-packed, creamy lemon chickpea whip
* lots of fresh herbs and crunchy nuts or seeds on top
* easy to make! While the squash roasts, make the 1-bowl glaze, food processor chickpea whip, and prepare any other toppings you like
* naturally gluten-free and soy-free with easy nut-free option
https://www.veganricha.com/wp-content/uploads/2026/10/roasted-honeynut-bean-puree-veganricha-2833.jpg More Winter Squash Recipes
* Delicata Squash Casserole
* Berbere Roated Kabocha Squash
* Pressure Cooker Curried Stuffed Acorn Squash
* Lentil, Apple, and Pecan-Stuffed butternut Squash Continue reading: Roasted Honeynut Squash with Lemon Chickpea Whip and Toasted Pine Nuts
The post Roasted Honeynut Squash with Lemon Chickpea Whip and Toasted Pine Nuts appeared first on Vegan Richa.
➖ Sent by @TheFeedReaderBot ➖
➖ @VeganFoodFeed ➖
Vegan Richa
Roasted Honeynut Squash with Lemon Chickpea Whip and Toasted Pine Nuts
If fall was a dinner, this would be it: roasted honeynut squash over creamy, lemony whipped chickpeas, topped with buttery toasted pine nuts.