No Place Like Home: Post-Hospital Update + Important Life Lessons from My Dogs & Lucy Ricardo
No Place Like Home: Post-Hospital Update + Important Life Lessons from My Dogs & Lucy Ricardo - YouTubeNo Place Like Home: Post-Hospital Update + Important Life Lessons from My Dogs & Lucy Ricardo - YouTube
No Place Like Home: Post-Hospital Update + Important Life Lessons from My Dogs & Lucy Ricardo - YouTubeNo Place Like Home: Post-Hospital Update + Important Life Lessons from My Dogs & Lucy Ricardo - YouTube
The Full Helping
Easy Lentil Sandwich Filling
Creamy, tangy, and packed with plant-based protein, this lightly mashed lentil sandwich filling is as simple as can be. Pickled red onions and mustard provide a sharp, savory kick, brought together with your favorite vegan mayo.
https://www.thefullhelping.com/wp-content/uploads/2026/10/Lentil-sandwich-filling-6-1024x1536.jpg
Lightly or fully mashed legume sandwiches have quietly become a lunchtime mainstay—probably the meal I pack for work more often than any other.
There is so much that I love about them:
* Convenience: These sandwiches are easy to pack, they hold up nicely in my lunchbox, and they’re not messy to eat at my desk. I don’t have to worry about stray bits of food escaping my fork and landing onto my keyboard.
* Versatility: Swapping in different legumes, different crisp, diced vegetables, minced fresh herbs, or varying sources of acid (lemon, vinegar, or in this case, pickled onion brine) can transform the recipe template.
* Nutrition: I love knowing that I’ve tucked a serving of beans or lentils—along with all of their plant protein, fiber, and micronutrients—into an effortless midday meal, no matter how busy the week is or how little time I’ve had for meal prep.
For years, I almost always defaulted to chickpeas or white beans for these kinds of sandwiches. Recipes like my vegan chickpea “tuna” salad with artichoke hearts and smashed garlic tahini white beans have lived on heavy rotation in my kitchen, and they remain favorites.
Lately, though, I’ve started turning to lentils just as often. Beyond helping me to vary my legume rotation, their smaller size is especially well-suited to a sandwich filling: you can lightly mash them with minimal effort, which cannot be said of chickpeas!
They result in a nice, soft sandwich that nevertheless has texture.
https://www.thefullhelping.com/wp-content/uploads/2026/10/Lentil-sandwich-filling-1-1024x1536.jpg Most brown and green lentils take 25-35 minutes to become tender. Taste a few at the 25-minute mark to ensure that you don’t overcook them. Letting Condiments Do the Heavy Lifting
One of my favorite low-lift cooking strategies is leaning on flavorful condiments. The right ones deliver enough seasoning to save you the effort of measuring out multiple spices, vinegars, or aromatics. In my easy chickpea burrito bowls, for example, a few spoonfuls of prepared salsa do the work of a whole spice blend—and spare you from having to chop an onion—with zero extra effort.
Here, a scoop of tangy pickled red onions plays a similar role. Between their bright, briny flavor and a spoonful of Dijon mustard, the filling becomes well-seasoned in an instant.
https://www.thefullhelping.com/wp-content/uploads/2026/10/Lentil-sandwich-filling-3-1024x1536.jpg If your pickled onions are on the milder side, splash in a teaspoon of their pickling brine to boost the savory tang. https://www.thefullhelping.com/wp-content/uploads/2026/10/Lentil-sandwich-filling-4-1024x1536.jpg For meal prep, store the filling separately in an airtight container for up to 4 days, then assemble just before eating to keep the bread soft and fresh.
Vegan mayo, meanwhile, lends a creamy texture and helps to mellow out the tart flavors. I use my homemade cashew mayonnaise, but any store-bought vegan mayo of your choice will work well. Key Ingredients & Simple Swaps
* Brown or green lentils: Standard brown or green lentils are my go-to. I’m also a big fan of Pardina lentils—a brown variety that’s smaller and rounder than conventional brown lentils—and they work nicely in the sandwich filling. I find that both French green and black lentils are a bit too firm and small to mash effectively in this recipe, while red lentils become too mushy.
* Vegan mayo: If you prefer an alternative or don’t have vegan mayo at home, you can swap in 6 tablespoons of tahini thinned w[...]
The Full Helping
Easy Lentil Sandwich Filling
An easy, creamy lentil sandwich filling seasoned with pickled red onions and Dijon mustard. Packed with plant protein and perfect for simple weekday lunches.
Vegan Food & Recipes Feed
The Full Helping Easy Lentil Sandwich Filling Creamy, tangy, and packed with plant-based protein, this lightly mashed lentil sandwich filling is as simple as can be. Pickled red onions and mustard provide a sharp, savory kick, brought together with your favorite…
ith a tablespoon or two of water.
* Quick pickled onions: I consider these a must for acidity, subtle sweetness, and crunch. While additional pickled vegetables—like pickled shredded carrots or traditional dill pickles—are nice additions, they won’t add the savoriness that onions will. If you don’t have a red onion at home to pickle, yellow onion, white onion, or shallots work just as well.
* Chopped celery: This provides another layer of crunch in the soft mash. I like the flavor of celery in a sandwich filling, too. If you’re not a celery person, try finely chopped cucumber or grated carrot instead.
* Soft sandwich bread & butter lettuce: This is my favorite way to serve the filling. With that said, it’s equally good scooped onto toasted bread open-faced, tucked into a wrap or pita pocket, or served alongside crackers.
https://www.thefullhelping.com/wp-content/uploads/2026/10/Lentil-sandwich-filling-5-1024x1535.jpg Layering the butter lettuce against the bread acts as a natural moisture barrier, ideal if you’re packing this sandwich to go. A Note on Texture
The only small technical detail that matters in this otherwise simple recipe is removing excess moisture from the lentils.
After boiling the lentils until tender, drain them thoroughly and spread them onto a baking sheet lined with paper towels or a clean tea towel. Lentils hold onto a lot of cooking water; draining them on the towels will ensure that your filling isn’t too liquidy once the mayo is added.
https://www.thefullhelping.com/wp-content/uploads/2026/10/lentil-sandwich-filling-2-1024x1536.jpg Spreading the drained lentils over a lined baking sheet removes excess water so your sandwich filling won’t be too wet. It’s also an easy way to cool the lentils down after boiling them.
https://www.thefullhelping.com/wp-content/uploads/2026/10/Lentil-sandwich-filling-6-150x150.jpg <svg<g<pathPrint Easy Lentil Sandwich Filling
<svg<defs<lineargradient<stop<stop<stop<stop<defs<lineargradient<stop<stop<stop<stop<defs<lineargradient<stop<stop<stop<stop
<svg<path<svg<path<svg<path<svg<path<svg<path
Creamy, tangy, and packed with plant-based protein, this lightly mashed lentil sandwich filling is as simple as can be. Pickled red onions and mustard provide a sharp, savory kick, brought together with your favorite vegan mayo.
Course lunch, Main Course
Cuisine American
Diet Gluten Free, Low Lactose, Vegan, Vegetarian
Keyword high protein, lentils, lunch, meal prep, protein
Prep Time 10 minutes minutes
Cook Time 30 minutes minutes
Servings 4 Servings
Author Gena Hamshaw Ingredients For the sandwich filling:
* 1 cup brown or green lentils (200 g)
* 1/2 cup homemade vegan mayo with cashews (or your favorite store-bought vegan mayonnaise; you can also substitute 6 tablespoons of tahini + 1-2 tablespoons of water)
* 1 tablespoon Dijon mustard
* 1 large stalk celery, finely chopped (or two smaller stalks)
* 2/3 cup finely chopped 10-minute quick pickled onions (adjust the amount to taste)
* Freshly ground black pepper, to taste To serve:
* 8 slices soft, whole grain or white sandwich bread (substitute rye, pumpernickel, sourdough, or another favorite sandwich bread)
* Butter lettuce leaves Instructions
*
Bring a pot of water to a boil. Add the lentils. Turn the heat to medium low, then simmer them for 25-35 minutes, or until they're tender but not overly mushy. Taste a few lentils after 25 minutes of cooking to ensure that you don't overcook them.
*
Drain the lentils. Line a baking sheet with paper or tea towels, then spread the cooked lentils over it. This step helps to remove excess moisture from the lentils, so that the filling doesn't become watery. Allow the lentils to drain and cool for 10 minutes.
*
Transfer the lentils to a mixing bowl. Add the mayonnaise and mustard. Use a wooden spoon to mix the lentils thorough[...]

Vegan Food & Recipes Feed
ith a tablespoon or two of water. * Quick pickled onions: I consider these a must for acidity, subtle sweetness, and crunch. While additional pickled vegetables—like pickled shredded carrots or traditional dill pickles—are nice additions, they won’t add the…
ly, mashing them up a little as you go. Fold in the celery and pickled onions, then taste the mixture and add freshly ground black pepper and salt as needed. You can be relaxed with this recipe: add extra chopped pickled onions or regular dill pickles, grated carrot, chopped nuts, or herbs of your choosing.
*
To make sandwiches, spread the lentil mixture over four pieces of soft sandwich bread, then top with butter lettuce leaves and another slice of bread. The filling makes a generous amount, so you may have enough for five sandwiches depending on the size of your bread! Slice the sandwiches in half and serve. Video Notes
Once prepared, the lentil sandwich filling will keep for up to four days in an airtight container in the fridge. I do not recommend freezing.
I hope that this humble sandwich will become as indispensable to you as it has to me, especially during hectic weeks when cooking isn’t a priority, but good lunchtime nutrition is. Enjoy!
xo
The post Easy Lentil Sandwich Filling appeared first on The Full Helping.
➖ @VeganFoodFeed ➖
Minimalist Baker
Cheesy Vegan Enchilada Skillet (30 Minutes!)
https://minimalistbaker.com/wp-content/uploads/2026/02/Cheesy-Vegan-Black-Bean-Enchilada-Skillet-9-680x1020.jpg Everything you love about enchiladas, minus the fuss! This super flavorful, cheesy vegan enchilada skillet comes together in about 30 minutes with simple methods, minimal dishes, and no need to fill or roll tortillas.
This easy, nourishing dish features tender cubed sweet potato or winter squash, fiber- & protein-rich black beans, and a rich red enchilada sauce. Everything gets simmered in 1 pan and topped with a melty cashew “cheese” that makes it SUPER satisfying and delicious!
Cheesy Vegan Enchilada Skillet (30 Minutes!) from Minimalist Baker →
➖ @VeganFoodFeed ➖
Minimalist Baker
Cheesy Vegan Enchilada Skillet (30 Minutes!)
Everything you love about enchiladas, minus the fuss! This super flavorful, cheesy vegan enchilada skillet comes together in about 30 minutes with simple
Chocolate Covered Katie
Pumpkin Dip
This homemade pumpkin dip is so unbelievably rich and creamy that everyone who tries it will be begging you for the recipe!
https://chocolatecoveredkatie.com/wp-content/uploads/2021/09/Pumpkin-Pie-Dip-For-A-Party.jpg https://chocolatecoveredkatie.com/wp-content/uploads/2015/09/pin-it-e1441245481357.png The best pumpkin dip recipe
* It’s the perfect Fall dessert to whip up for any event or gathering.
* Light, fluffy, and made with just 5 ingredients!
* The entire recipe comes together in minutes, without any fancy equipment.
* And the spicy, sweet filling tastes exactly like classic pumpkin cheesecake.
* Plus, unlike many similar pumpkin dip recipes, there is no Cool Whip, sour cream, vanilla pudding mix, sweetened condensed milk, or heavy cream required.
Don’t be surprised if you find yourself eating this smooth and absolutely delicious no bake pumpkin dip straight from the bowl with a spoon. Also be sure to try this Crustless Pumpkin Pie Step by step recipe video Above, watch the pumpkin dip recipe video.
This is it, the best pumpkin cheesecake dip of them all. It’s simple, quick, and my favorite part is the natural ingredients! Will make again!
– Lisa C Read More Reviews
https://chocolatecoveredkatie.com/wp-content/uploads/2021/09/Homemade-Pumpkin-Dip-Ingredients.jpg Pumpkin pie dip ingredients Pumpkin Puree – I like to use canned pumpkin puree here, because it makes everything so easy. Just open the can, and you are good to go! If you prefer to roast your own pumpkin and blend up homemade pumpkin puree, that is fine.
No pumpkin to be found? Sweet potato tastes wonderful as a substitute for the pumpkin. (Here’s the best method for How To Cook Sweet Potatoes.)
If you are using canned pumpkin, brands such as 365, Farmer’s Market Organic, Target Good & Gather, Trader Joe’s, or Libby’s 100% Pure Pumpkin are all good options.
Canned pumpkin pie filling works if you decrease the sweetener, salt, and spices in the recipe to taste. Cream Cheese – Use your favorite brand, whether it is Philadelphia style cream cheese (block or spread) or a low fat or dairy free alternative. For a vegan pumpkin dip without cream cheese, substitute an equal amount of coconut cream. Sweetener – Any all purpose sweetener is fine, although liquid sweeteners such as pure maple syrup, agave, or honey yield a thinner dip. I recommend powdered sugar for the best thick, whipped and fluffy texture. You can turn it into a low carb and sugar free pumpkin dip by using powdered erythritol or monk fruit. Or sweeten with keto friendly stevia to taste.
Classic white sugar, unrefined date sugar, or brown sugar also work. Just blend granulated sweetener until it has a similar texture to powdered sugar. Then measure after blending. Vanilla Extract – Be sure to buy pure vanilla extract at the grocery store, not imitation vanilla flavoring. Your dip will taste a hundred times better, trust me. Spices – Ground cinnamon and pumpkin pie spice add incredible Fall flavor to the pumpkin recipe. You can either buy a jar of pumpkin pie spice or make your own at home. Homemade Pumpkin Pie Spice
If you cannot find pumpkin pie spice at the store, or if you want to save money by using spices you already own, combine the following:
* 1/2 teaspoon ground cinnamon
* 1/4 teaspoon ground nutmeg
* 1/4 teaspoon ground ginger
* 1/8 teaspoon ground cloves
Stir these spices together to create your own DIY pumpkin spice blend. Store in a tightly sealed jar until ready to use.
https://chocolatecoveredkatie.com/wp-content/uploads/2021/09/The-Best-Pumpkin-Dip-Recipe.jpg Pumpkin party dessert dip serving ideas
* This makes a great party dip, served with graham crackers[...]
Chocolate Covered Katie
Pumpkin Dip
This is the best pumpkin dip recipe you'll find, with a creamy texture and just 5 ingredients! Serve it for dessert or a quick healthy snack.
Vegan Food & Recipes Feed
Chocolate Covered Katie Pumpkin Dip This homemade pumpkin dip is so unbelievably rich and creamy that everyone who tries it will be begging you for the recipe! https://chocolatecoveredkatie.com/wp-content/uploads/2021/09/Pumpkin-Pie-Dip-For-A-Party.jpg h…
, gingersnaps, pretzels, or vanilla wafer cookies.
* Or try it for breakfast spread on top of pancakes, waffles, or bagels. Serve with fresh sliced fruit like apples and bananas.
* The pumpkin dip is also delicious as a healthy frosting for cupcakes, cakes, Healthy Banana Bread, or Baked Apple Cider Donuts.
Of course, you can also eat it straight out of the blender by the spoonful!
https://chocolatecoveredkatie.com/wp-content/uploads/2021/09/Dessert-Pumpkin-Dip-Recipe.jpg How to make pumpkin dip Step 1: Gather your ingredients. Let the cream cheese come to room temperature. This step will help it to blend more easily without lumps. Step 2: Combine ingredients. Add the softened cream cheese or coconut cream, pumpkin puree, cinnamon, pumpkin pie spice, pure vanilla extract, and sweetener to a blender, food processor, or large mixing bowl. Step 3: Blend until smooth and fluffy. Using a food processor, blender, stand mixer, or hand beaters yields the smoothest results by far. However, you can stir everything together by hand with a lot of arm strength and patience if you don’t own any of these mixing machines. Step 4: Transfer to a serving bowl. Serve cold or at room temperature, alongside cookies or fruit of choice. Step 5: Store leftovers. The pumpkin pie dip is fine to leave out for a few hours at a party or when serving to guests. For freshness due to the perishable ingredients, store leftover dip tightly covered in the refrigerator for up to five days. Leftover cream cheese? Make Greek Yogurt Cheesecake
https://chocolatecoveredkatie.com/wp-content/uploads/2021/09/Pumpkin-Cheesecake-Dip-For-Dessert.jpg Frequently asked questions Can you make it the night before?
To save time, you can prepare everything up to a day in advance. Tightly cover the blended dip and refrigerate, then stir well before serving. Can you freeze pumpkin cream cheese dip?
Technically yes, you can freeze leftovers. The snack dip will not be quite as creamy, and the texture is best if not frozen, but the taste is still good! What if I want to make a savory pumpkin dip?
Create a savory pumpkin appetizer or side dish by omitting the sweetener and pumpkin spice in the recipe below.
Cut the cinnamon back to just a fourth teaspoon. And season with autumn friendly spices like onion, garlic powder, and cumin.
Garnish the dip with tahini drizzled over top, and serve the dish alongside potato chips, herb crackers, or a raw vegetable platter. Can you add protein powder?
Feel free to blend in a scoop of your favorite protein powder to create a healthy snack.
I recommend going with either unsweetened protein powder or any flavor that compliments pumpkin. Try vanilla, chai, caramel, or cinnamon rol. What other things can you do with leftover pumpkin?
One of the many great things about this recipe is that it calls for an entire can of pumpkin puree. So there’s no need to worry about leftovers.
In general, my favorite ways to use up canned pumpkin include Flourless Pumpkin Muffins, Keto Pumpkin Bread, Pumpkin Mac and Cheese, and Protein Pumpkin Bread.
Oh and Healthy Pumpkin Pie!
https://chocolatecoveredkatie.com/wp-content/uploads/2021/09/Easy-Pumpkin-Dessert-Dip-Recipe-For-Parties.png
https://chocolatecoveredkatie.com/wp-content/uploads/2021/09/Pumpkin-Pie-Dip-For-A-Party-245x245.jpg <svg<g<pathPrint Pumpkin Dip
<svg<defs<lineargradient<stop<stop<stop<stop<defs<lineargradient<stop<stop<stop<stop<defs<lineargradient<stop<stop<stop<stop
<svg<path<svg<path<svg<path<svg<path<svg<path This easy dessert pumpkin dip is smooth, creamy, and perfect for Fall parties. Course Dessert
Cuisine American
Keyword cheesecake, cinnamon, coconut cream, cream cheese, pumpkin
Prep Time 5 minutes minutes
Total Time 5 minutes minutes
Servings 3 1/2 cups
Calories 60kcal
Author Katie Higgins I[...]

Vegan Food & Recipes Feed
, gingersnaps, pretzels, or vanilla wafer cookies. * Or try it for breakfast spread on top of pancakes, waffles, or bagels. Serve with fresh sliced fruit like apples and bananas. * The pumpkin dip is also delicious as a healthy frosting for cupcakes, cakes…
ngredients
* 1 can pumpkin puree (15 oz)
* 8 oz cream cheese or coconut cream
* 2 tsp cinnamon
* 1 tsp pumpkin pie spice (or extra cinnamon)
* 1 1/2 tsp pure vanilla extract
* 1/2 cup powdered sugar or erythritol (see note above for other options) Instructions
*
1. If using, let cream cheese come to room temperature so it blends more smoothly.
*
2. Blend the cream cheese or coconut cream, pumpkin puree, cinnamon, pumpkin pie spice, vanilla extract, and sweetener in a food processor, blender, stand mixer, or with beaters until smooth. (You can stir everything together by hand, although the texture will be less whipped and fluffy.)
*
3. Serve in a bowl, alongside gingersnaps, sliced apples, graham crackers, or dipping snacks of choice.
*
4. Store leftovers tightly covered in the refrigerator for up to five days.
* View Nutrition Facts Video Notes
Readers also love this healthy Pumpkin Banana Bread. Nutrition
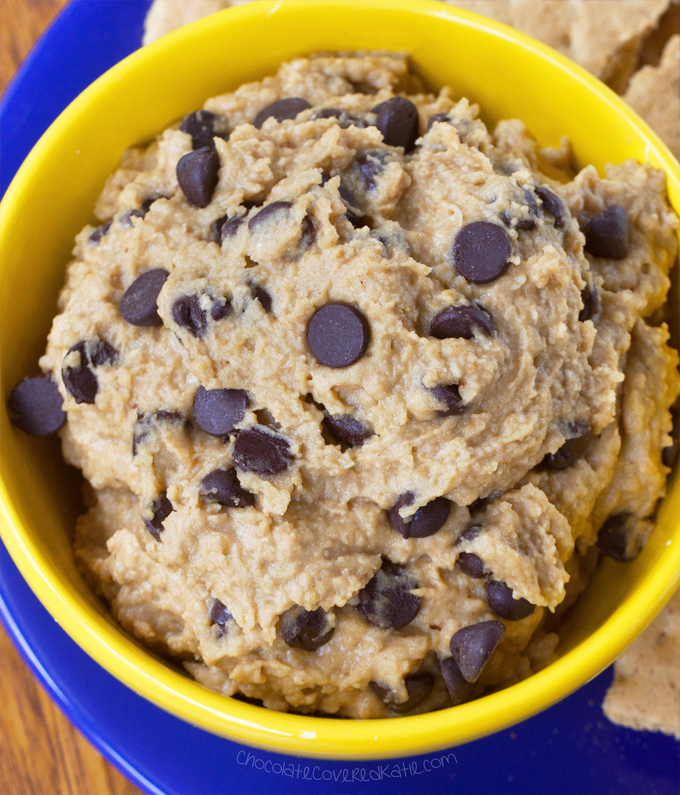
Serving: 60g | Calories: 60kcal | Carbohydrates: 3g | Protein: 1g | Fat: 5g | Saturated Fat: 2g | Polyunsaturated Fat: 2g | Monounsaturated Fat: 1g | Sodium: 60mg | Potassium: 65mg | Fiber: 1.1g | Sugar: 1g | Vitamin A: 300IU | Vitamin C: 4mg | Calcium: 34mg | Iron: 1mg More dessert dip recipes https://chocolatecoveredkatie.com/wp-content/uploads/2018/01/banana-cookie-dip.jpg Chickpea Cookie Dough Dip https://chocolatecoveredkatie.com/wp-content/uploads/2025/06/Cannoli-Filling-Dip-With-Waffle-Cones-And-Strawberries.jpg Cannoli Dip https://chocolatecoveredkatie.com/wp-content/uploads/2024/08/Easy-Oreo-Fluff-Salad-Recipe.jpg Oreo Fluff Salad https://chocolatecoveredkatie.com/wp-content/uploads/2018/10/Avocado-Chocolate-Mousse.jpg Avocado Chocolate Mousse https://chocolatecoveredkatie.com/wp-content/uploads/2020/09/Vegan-Dessert-Hummus.jpg Chocolate Hummus https://chocolatecoveredkatie.com/wp-content/uploads/2024/07/Banana-Party-Dip.jpg Banana Pudding Dip https://chocolatecoveredkatie.com/wp-content/uploads/2022/06/Chocolate-Chip-Peanut-Butter-Dip.jpg Peanut Butter Dip
The post Pumpkin Dip appeared first on Chocolate Covered Katie.
➖ @VeganFoodFeed ➖
Vegan Richa
Easy Cream of Mushroom Soup
This easy vegan cream of mushroom soup is rich, savory, and packed with mushroom flavor, plus 14g protein per serving! Made with simple ingredients and ready in just 30 minutes. Perfect with crusty bread for dipping! (gluten-free, soy-free with easy nut-free option)
This recipe was originally posted March 6, 2013. It has been updated with modified recipe, pictures and video.
https://www.veganricha.com/wp-content/uploads/2013/03/cream-of-mushroom-soup-22.jpg
This cream of mushroom soup is a recipe that my friend Somer McCowan shared on my site over 10 years ago. Somer passed away from cancer months ago, and I’ve been thinking about her a lot, which got me thinking about this soup .
I tweaked Somer’s recipe a little bit, reducing the cashews, and changed a couple of the steps in the cooking method to make it simpler.
https://www.veganricha.com/wp-content/uploads/2013/03/cream-of-mushroom-soup-23.jpg
The original recipe called for adding all of the stock to the mushroom mixture and boiling it and then blending some of that soup, but it’s not as easy when you have to transfer boiling liquid into a blender. So instead, I’m blending part of the cooked onion and mushroom mixture with the cashews and adding that back into the pan, then adding the remaining stock.
https://www.veganricha.com/wp-content/uploads/2013/03/image.png
This is just such a simple and delicious soup! You can change up the flavors to preference, deepen the flavors by adding some miso, add some fresh herbs for additional flavor, and some pepper flakes for a little bit of heat, if you like. If you don’t have wine, you can use balsamic vinegar instead.
https://www.veganricha.com/wp-content/uploads/2013/03/cream-of-mushroom-soup-15.jpg
Somer was just an amazing person, and her recipes were always incredible. When I was dealing with health issues, she pitched in with this guest recipe to help keep my blog going. She was just an absolute superwoman. She wrote for Forks Over Knives, co-hosted the Virtual Vegan Potluck, and was just the sweetest, most beautiful, compassionate person.
Somer’s cream of mushroom soup recipe is simple, yet it’s so creamy and flavorful with herbs and plenty of umami! She said, “I’d like to think if I was able to go to Richa’s house and bring her some lunch, that I’d bring her a big bowl of this soup. Feel better soon, girl.”
https://www.veganricha.com/wp-content/uploads/2013/03/cream-of-mushroom-soup-19.jpg
Why You’ll Love Cream of Mushroom Soup
* delicious, creamy soup with amazing herb and mushroom flavor
* easy to make in 30 minutes with simple ingredients
* gluten-free and soy-free with nut-free and oil-free options
More Quick and Easy Soups
* 1-Pot Lemon White Bean Soup
* Creamy Tortellini Soup
* Indian Spiced Tomato Soup
* Dal Fry – Spiced Indian Lentil Soup
Continue reading: Easy Cream of Mushroom Soup
The post Easy Cream of Mushroom Soup appeared first on Vegan Richa.
➖ @VeganFoodFeed ➖
Vegan Richa
Easy Vegan Cream of Mushroom Soup
This delicious, vegan cream of mushroom soup only uses simple ingredients and is ready in half an hour! Perfect with some crusty bread to dip.
Jackson Boxer’s vegan recipe for poached leeks with pickled pear and hazelnuts | Food | The Guardian
https://www.theguardian.com/food/2026/oct/17/poached-leeks-pickled-pear-hazelnuts-vegan-recipe-jackson-boxer?shem=dsdf,sharefoc,agadiscoversdl,,sh/x/discover/m1/4
https://www.theguardian.com/food/2026/oct/17/poached-leeks-pickled-pear-hazelnuts-vegan-recipe-jackson-boxer?shem=dsdf,sharefoc,agadiscoversdl,,sh/x/discover/m1/4
the Guardian
Jackson Boxer’s vegan recipe for poached leeks with pickled pear and hazelnuts
‘Ethereal sigh’ or ‘slimy hopelessness’? Respect this demanding veg and it will reward you
How I made CABBAGE taste 10x BETTER | Hot "Honey" Cabbage with Butter Beans and Garlic Breadcrumbs
How I made CABBAGE taste 10x BETTER | Hot "Honey" Cabbage with Butter Beans and Garlic Breadcrumbs - YouTubeHow I made CABBAGE taste 10x BETTER | Hot "Honey" Cabbage with Butter Beans and Garlic Breadcrumbs - YouTube
How I made CABBAGE taste 10x BETTER | Hot "Honey" Cabbage with Butter Beans and Garlic Breadcrumbs - YouTubeHow I made CABBAGE taste 10x BETTER | Hot "Honey" Cabbage with Butter Beans and Garlic Breadcrumbs - YouTube
Chocolate Covered Katie
Healthy Butterfingers
Healthy Butterfingers feature a classic toffee-like crunch, smooth chocolate coating, and much less saturated fat and sugar than the packaged candy bars!
https://chocolatecoveredkatie.com/wp-content/uploads/2026/10/Healthy-Butterfingers.jpg https://chocolatecoveredkatie.com/wp-content/uploads/2015/09/pin-it-e1441245481357.png Why you’ll love these healthy Butterfingers
* You need just 5 ingredients to make the recipe.
* As if by magic, they have the exact same crispy, crunchy texture of store bought peanut butter Butterfinger candy bars!
* You’ll immediately become obsessed with the rich chocolate peanut buttery flavor.
* The homemade healthy candy bars defy all logic. Whole grain, dairy free, refined sugar free, gluten free, and vegan options are all included.
* Plus, unlike packaged Butterfinger bars, there is NO corn syrup. Instead, they are naturally sweetened with pure maple syrup and nutrient rich blackstrap molasses.
It’s one of those recipes you really have to try in order to believe! You may also like: Healthy Chocolate Chip Cookies Step by step recipe video
Update: I’ve since made the no bake Butterfinger bars even healthier and easier to prepare, by eliminating the granulated sugar and cooking step altogether.
https://chocolatecoveredkatie.com/wp-content/uploads/2026/10/Gluten-Free-Butterfingers.jpg The original healthy Butterfinger bars
You may now find hundreds of healthy Butterfinger recipes on the internet. This is the one recipe that started it all, which I first shared almost 15 years ago.
My inspiration for these homemade Butterfinger candy bars came from a dollar bin cookbook I saw at a local fabric and craft store.
The book recipe, which yielded a standard 8 inch pan just like mine, called for a full cup of sugar, 1/3 cup of shortening, and 3/4 cup of corn syrup!
Yes, 3/4 cup of corn syrup in addition to the cup of sugar…
It was basically screaming for a healthy makeover.
I got to work on the challenge as soon as I got home. Luckily, this is one of those recipes that turned out perfectly on the first try, and the healthy “Betterfinger” bars really do taste like actual Butterfinger candy bars!
If you’re looking for a healthy dessert that will impress even the most skeptical or pickiest of eaters, these healthy vegan Butterfingers are definitely the recipe to try on all your friends.
In the years since I first published, it’s become one of the site’s most popular recipes. The copycat Butterfingers are a delicious snack or dessert for Halloween, Easter, or any time you are craving crispety, crunchety peanut buttery chocolate candies.
Readers often write in to tell me that even their health-food-hating dads, moms, brothers, sisters, girlfriends, or boyfriends love the bars too!
Katie, these are AMAZING!!! My husband said and I quote “These are better than any chocolate bar I have ever tasted!” Needless to say they are a hit in my house! I will definitely be bringing these to my next party!!
– Rachel Read More Reviews
https://chocolatecoveredkatie.com/wp-content/uploads/2026/10/Vegan-Butterfinger-Ingredients-Molasses-Bran-Flake-Cereal.jpg Key ingredients Flake Cereal – I like bran flakes, but multigrain or gluten free corn flakes work well too. Peanut Butter – This can be crunchy or creamy. Natural peanut butter is the healthiest option, although brands like Skippy or Jif are fine. Make them more allergy friendly by substituting almond butter, cashew butter, or nut free sunflower seed butter. Pure Maple Syrup – An unrefined liquid sweetener like maple syrup, agave, or honey (not for vegans) adds sweetness and the stickiness needed to b[...]
Chocolate Covered Katie
Healthy Butterfingers
This healthy Butterfingers recipe gives you the same crispy, crunchy texture of the popular candy bar, with less sugar and no corn syrup!
Vegan Food & Recipes Feed
Chocolate Covered Katie Healthy Butterfingers Healthy Butterfingers feature a classic toffee-like crunch, smooth chocolate coating, and much less saturated fat and sugar than the packaged candy bars! https://chocolatecoveredkatie.com/wp-content/uploads/2026/10/Healthy…
ind the bars together. Blackstrap Molasses – This is my favorite healthy sugar alternative. It provides a classic toffee or caramel flavor while also giving you iron, calcium, and magnesium. Salt – A pinch of salt balances the sweetness in these homemade Butterfingers. Chocolate Chips – I like semi sweet or dark chocolate chips, which contain more flavanols than milk chocolate. Use dairy free chocolate chips for vegan Butterfingers. Oil (optional) – Stirring a teaspoon of coconut oil into the chocolate yields a smoother sauce. You can absolutely omit the oil if you prefer. While the peanut butter is out, make Chocolate Oatmeal Fudge Bars
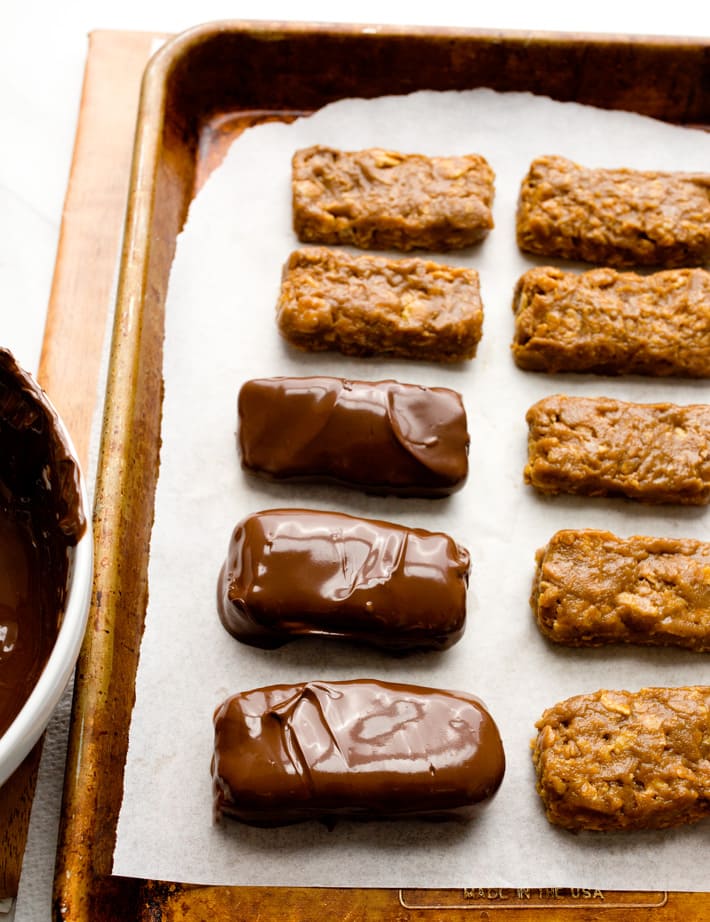
https://chocolatecoveredkatie.com/wp-content/uploads/2026/10/Homemade-Butterfinger-Healthy-Candy-Bars.jpg How to make healthy gluten free Butterfingers Step 1: Bring peanut butter to room temperature. You want the nut butter to be soft and easy to stir. Either let it sit out of the refrigerator until easily stirrable, or warm it up with the pure maple syrup and molasses in a saucepan on the stove top. Step 2: Combine all ingredients. Add the softened nut butter, sweeteners, salt, and flake cereal to a large measuring cup or saucepan. Step 3: Mix everything together. Stir the ingredients vigorously with a fork or heavy spatula. Crush the cereal well. Keep stirring until everything is thoroughly mixed and evenly coated. Step 4: Spread into a pan. Line the bottom of an eight inch square baking pan with wax or parchment paper. Transfer the peanut butter cereal mixture to the pan, and smooth it down evenly. It will fill the whole pan, or you can make thicker bars by only filling it up halfway. Tip: I like to use a second layer of parchment paper to really press the mixture into the pan. Step 5: Freeze. Place the baking pan in the freezer until the bars are fully hardened. Step 6: Add chocolate. Carefully melt the chocolate chips in a microwave or double boiler. Remove the frozen Butterfingers from the freezer and pour the chocolate sauce on top. Alternatively, you can slice into bars and then dip each bar in melted chocolate. Step 7: Return to the freezer. Freeze the pan again for just a few minutes, to set the chocolate. Remove when the topping is still a little soft, to prevent it from cracking when you slice bars. Step 8: Enjoy! If you somehow happen to find yourself with leftovers, store them in a very cool place on the counter for up to a week. (Emphasis on cool, as they will slowly start to melt at room temperature.) Or cover tightly and store in the refrigerator for up to two weeks or freezer for up to three months. Or just ship the bars to me. I’ll eat them for you! Leftover melted chocolate? Try this Chocolate Raspberry Bark Reader tip
Crumble up a homemade Betterfinger bar into Banana Ice Cream or Almond Milk Ice Cream for your own copycat DQ healthy Butterfinger Blizzard!
https://chocolatecoveredkatie.com/wp-content/uploads/2012/10/Easy-Chocolate-Peanut-Butter-Butterfingers-Vegan.jpg Homemade Butterfinger health benefits High iron. Thanks to powerhouse blackstrap molasses and antioxidant rich chocolate, the crunchy chocolate peanut butter candy bars give you 10% of the daily iron recommendation. High protein. Each bar provides over 6.5 grams or protein, even without any protein powder! Good source of fiber. You get whole grains and close to 10% of the RDA for fiber in 1 serving. Low sugar. These contain just 10 grams of sugars, as opposed to more than 20 grams in a packaged Butterfinger candy bar. Low saturated fat. The homemade version has just 2 grams saturated fat instead of the 5 grams in the store bought version. They are lower calorie and lower carb too.
https://chocolatecoveredkatie.com/wp-content/uploads/2012/10/The-Original-Copycat-Healthy-Butterfinger-Bars.png
https://chocolatecoveredkatie.com/wp-content/uploads/2012/10/Vegan-Butterfingers-Candy-[...]
Vegan Food & Recipes Feed
ind the bars together. Blackstrap Molasses – This is my favorite healthy sugar alternative. It provides a classic toffee or caramel flavor while also giving you iron, calcium, and magnesium. Salt – A pinch of salt balances the sweetness in these homemade…
Bars-Recipe-150x150.jpg <svg<g<pathPrint Healthy Butterfingers
<svg<defs<lineargradient<stop<stop<stop<stop<defs<lineargradient<stop<stop<stop<stop<defs<lineargradient<stop<stop<stop<stop
<svg<path<svg<path<svg<path<svg<path<svg<path Make your own crispety, crunchety, chocolate peanut butter homemade healthy Butterfingers, with gluten free and vegan options and just 5 ingredients!
Course Dessert, Snack
Cuisine American
Keyword bran flakes, butterfinger, candy, chocolate, healthy, molasses, peanut butter, vegan
Prep Time 10 minutes minutes
Total Time 10 minutes minutes
Servings 16 bars
Calories 160kcal
Author Katie Higgins Ingredients
* 1 cup peanut butter or allergy friendly nut or seed butter (240g)
* 1/3 cup pure maple syrup or honey (80g) (For keto, try these Keto Candy Bars)
* 1 1/2 tbsp blackstrap molasses or additional maple syrup (22g)
* 1 1/2 cups flake cereal (such as bran flakes or gluten free corn flakes)
* 1/8 tsp salt (increase to 1/4 tsp if using unsalted nut butter)
* 3 oz chocolate chips or sugar free chocolate chips (increase to 9 oz if you wish to coat the entire bar in chocolate) Instructions
*
1. Let peanut butter sit out until easy to stir. Alternatively, warm it in a saucepan on the stove top with the maple syrup and molasses.
*
2. Stir the softened nut butter, sweeteners, salt, and cereal in a large measuring cup or saucepan. Crush the cereal with a fork or heavy spatula, and keep stirring until all cereal is evenly coated.
*
3. Transfer the mixture to an 8 inch square pan lined with parchment paper. Smooth it down to fill the whole pan, or make thicker bars by only filling up half of the pan. Press down very firmly.
*
4. Place the pan of healthy Butterfingers in the freezer to harden.
*
5. Melt chocolate chips in the microwave or a double boiler. Pour the melted chocolate over the frozen Butterfingers or dip each bar in chocolate.
*
6. Freeze again to set the chocolate shell. If cutting into bars, remove from the freezer when the chocolate is still a little soft to prevent cracking. Slice into bars.
*
7. Store any leftovers tightly covered in the refrigerator for up to two weeks on in the freezer for up to three months.
* View Nutrition Facts Video Notes
Readers also love copycat Chocolate Peanut Butter Eggs or Homemade Bounty Bars. Nutrition
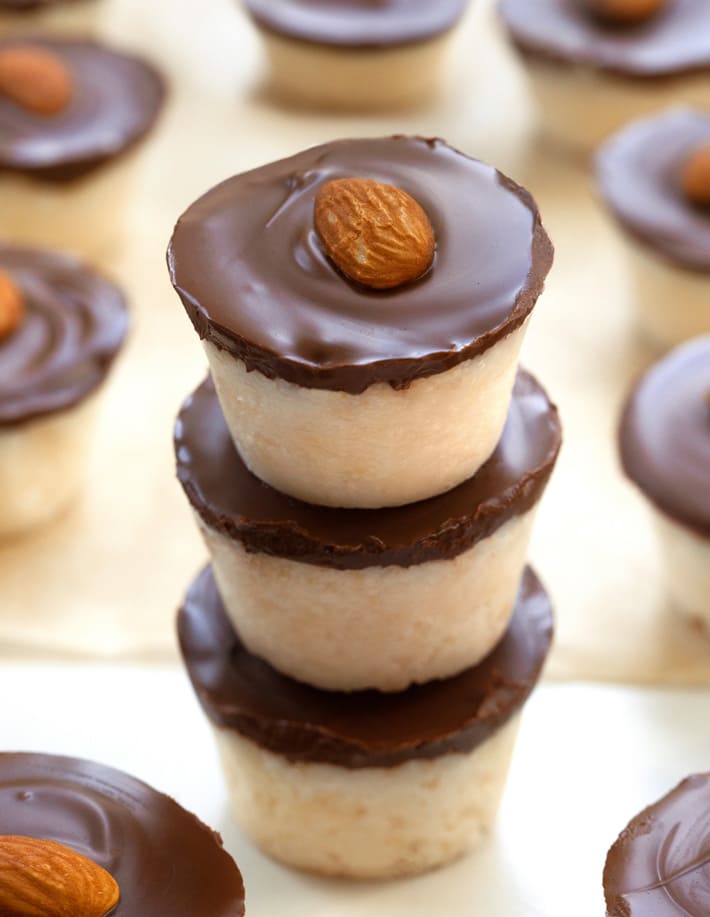
Serving: 1bar | Calories: 160kcal | Carbohydrates: 15g | Protein: 6.6g | Fat: 8g | Saturated Fat: 2g | Polyunsaturated Fat: 4g | Monounsaturated Fat: 2g | Sodium: 50mg | Potassium: 204mg | Fiber: 2.6g | Sugar: 10g | Vitamin A: 12IU | Vitamin C: 2mg | Calcium: 46mg | Iron: 2mg More healthy candy bar recipes https://chocolatecoveredkatie.com/wp-content/uploads/2026/10/Healthy-Almond-Joy-Candy-Cups-Dairy-Free-Sugar-Free.jpg Healthy Almond Joy https://chocolatecoveredkatie.com/wp-content/uploads/2020/05/Easy-Homemade-Protein-Bars-Recipe.jpg Protein Bars https://chocolatecoveredkatie.com/wp-content/uploads/2024/12/English-Vegan-Toffee-Bark.jpg Vegan Toffee https://chocolatecoveredkatie.com/wp-content/uploads/2025/11/Vegan-Peppermint-Bark-Dark-Chocolate-White-Chocolate-Layers.jpg Vegan Peppermint Bark https://chocolatecoveredkatie.com/wp-content/uploads/2025/10/Vegan-Crunch-Bars.jpg Homemade Crunch Bars https://chocolatecoveredkatie.com/wp-content/uploads/2025/10/Snickers-Ice-Cream-Bars-Candy.jpg Snickers Ice Cream Bars https://chocolatecoveredkatie.com/wp-content/uploads/2020/12/How-To-Make-Healthy-Fudge.jpg Healthy Chocolate Fudge https://chocolatecoveredkatie.com/wp-content/uploads/2020/08/Homemade-Chocolate-Bars.jpg Homemade Chocolate Bars https://chocolatecoveredkatie.com/wp-content/uploads/2020/07/Easy-Healthy-Peanut-Butter-Fudge-Recipe.jpg Healthy Peanut Butter Fudge https://chocolatecoveredkatie.com/wp-content/uploads/2019/07/Low-Carb-Keto-Chocolate-Vegan-Coconut-Fudge-Bars-Recipe.jpg Chocolate C[...]
Vegan Food & Recipes Feed
Bars-Recipe-150x150.jpg <svg<g<pathPrint Healthy Butterfingers <svg<defs<lineargradient<stop<stop<stop<stop<defs<lineargradient<stop<stop<stop<stop<defs<lineargradient<stop<stop<stop<stop <svg<path<svg<path<svg<path<svg<path<svg<path Make your own crispety…
oconut Bars https://chocolatecoveredkatie.com/wp-content/uploads/2016/02/email-feedburner.png https://chocolatecoveredkatie.com/wp-content/uploads/2016/10/hello-breakfast-recipes-1.png More About The Cookbook
The post Healthy Butterfingers appeared first on Chocolate Covered Katie.
➖ @VeganFoodFeed ➖
The post Healthy Butterfingers appeared first on Chocolate Covered Katie.
➖ @VeganFoodFeed ➖